

A Sense of Touch
Introduction
You will find out how to add bump switches to your Marty and how to use them in different ways such as avoiding obstacles and knowing when to kick a football!
How do you connect bump switches to Marty? How do you use them?
This activity shows how bump switches are added and, through example code, gives you a taster of different ways that bump switches can be used
What you will need
- A Scratch 3 compatible device
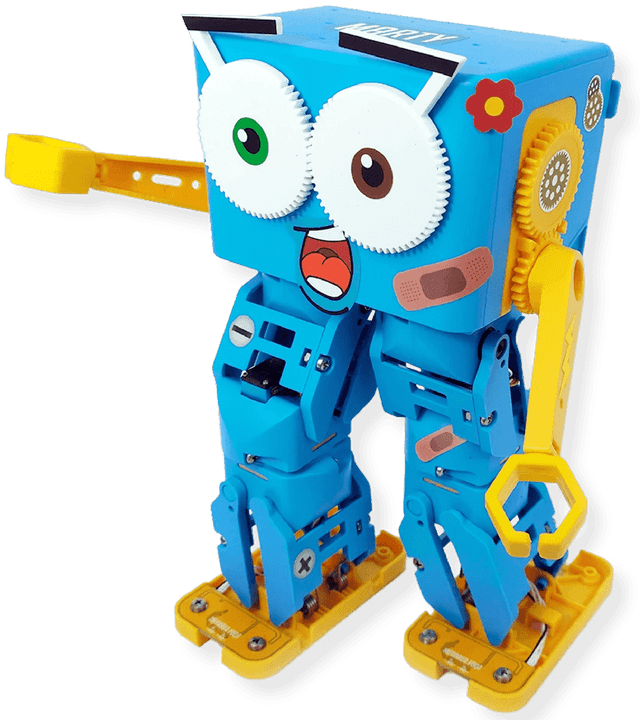
- Marty the Robot
- Bump switches (included with your Marty)
What will you learn about?
- Variables
- Sequencing
- Sensing
- Functions
Extra information for educators
This activity gives instructions on how to add bump switches to Marty. It then explores examples of different ways that bump switches can be used and full example code is provided,
What is a Bump Switch?
Bump switches (sometimes called snap-action switches or limit switches) give Marty the sense of “touch”. Like all switches, they are devices used to make or break connections in an electric circuit.
In robotics, bump switches can be placed on the outside of the robot allowing it to respond to the environment. When a bump switch is pressed, usually due to the robot coming into contact with (or “bumping” into) something, it completes an electric circuit and sends a signal to the control board.
What Can I Do With a Bump Switch?
Bump switches can be used for all sorts of things in robotics! Some uses include:
- Detecting when Marty walks into something (like a wall, or an object)
- Detecting when Marty kicks a ball
- Preventing Marty from walking off a table or other surface
- Helping Marty to solve a maze
- Helping Marty vacuum a room efficiently....
- …anything else you can think of
When a bump switch is plugged into Marty’s control board you can detect whether it is being pressed or not using an Input Block in Scratch!
Connecting the bump switch to Marty
Wondering how to install your bump switches? Here goes...
Every Marty comes with 2 bump switches (one for each foot) so you can attach one to the front of the right foot and one to the front of the left to start with. They are easy to identify as our bump switches have a black, red and white cable and one end will have a metal clip/switch on it. You will learn new positions for them in the 'Going Over The Edge activity'. They can also be put on the back of the foot so Marty can sense when they bump into something behind them.
Now let's connect the bump switches, one to each foot as follows:
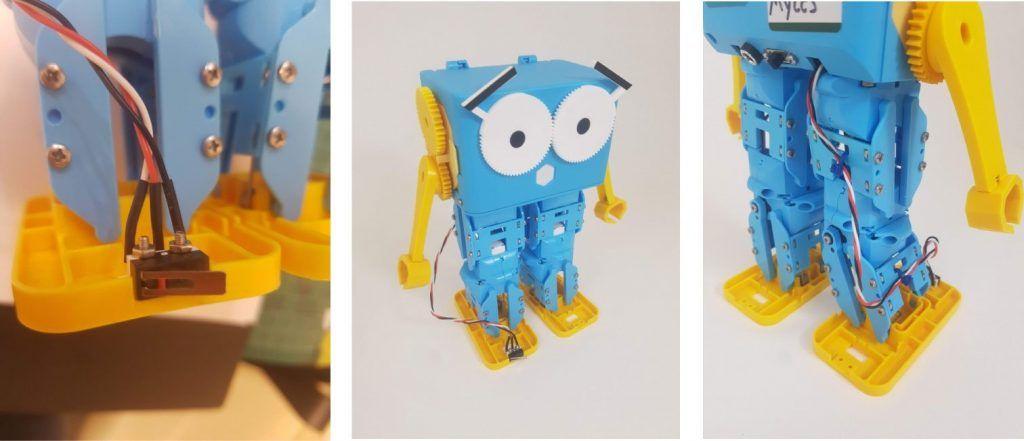
The switch itself can be attached to the foot in various places using two small M2 nuts and bolts. In the pictures below it is shown connected to the front of Marty’s right foot. The screws are screwed in from the bottom of Marty's foot.
The photos here show Marty with a bump switch connected. Cable ties can be used to keep the wire out of trouble - but make sure to leave enough slack that Marty’s leg can still move properly through the full range of movement!
To connect bump switches to Marty's control board open up Marty’s head by loosening the two screws on either side of Marty’s face until you can open the face and access the electronics inside.
The side that does not have the metal clip/switch on it should be fed through the back of Marty's head and plugged into the control board.
The cable for the bump switch can be passed through any of the openings on the back of Marty’s head (on either side of the on/off switch). The cable for the right foot should be fed in on the right side of the on/off switch and the left foot switch should be on the left side of the on/off switch.
The cable can can be twisted before screwing it in to help make it neater. This is how it should look once you've fed the cable through the hole and plugged it in:
(It is often easier to temporarily take off an arm or lift the control board out of the slots to give more working room
- these lift out quite easily)
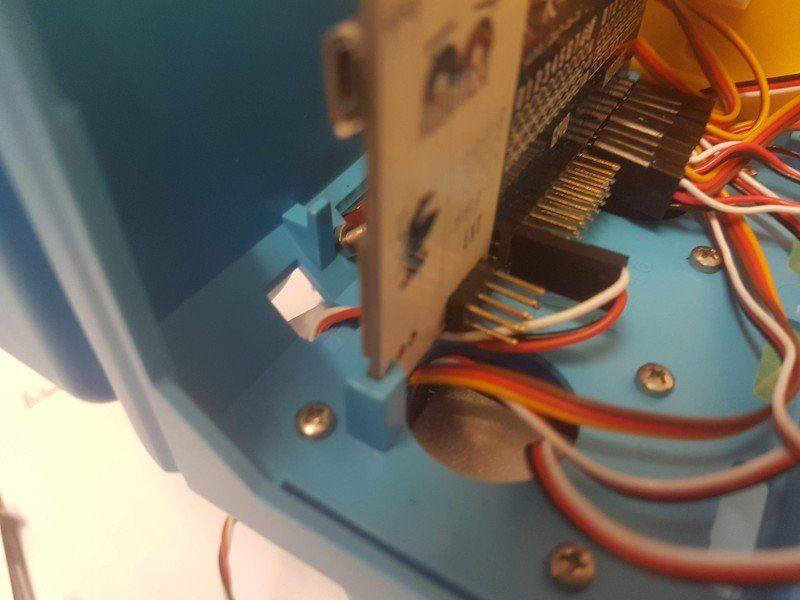
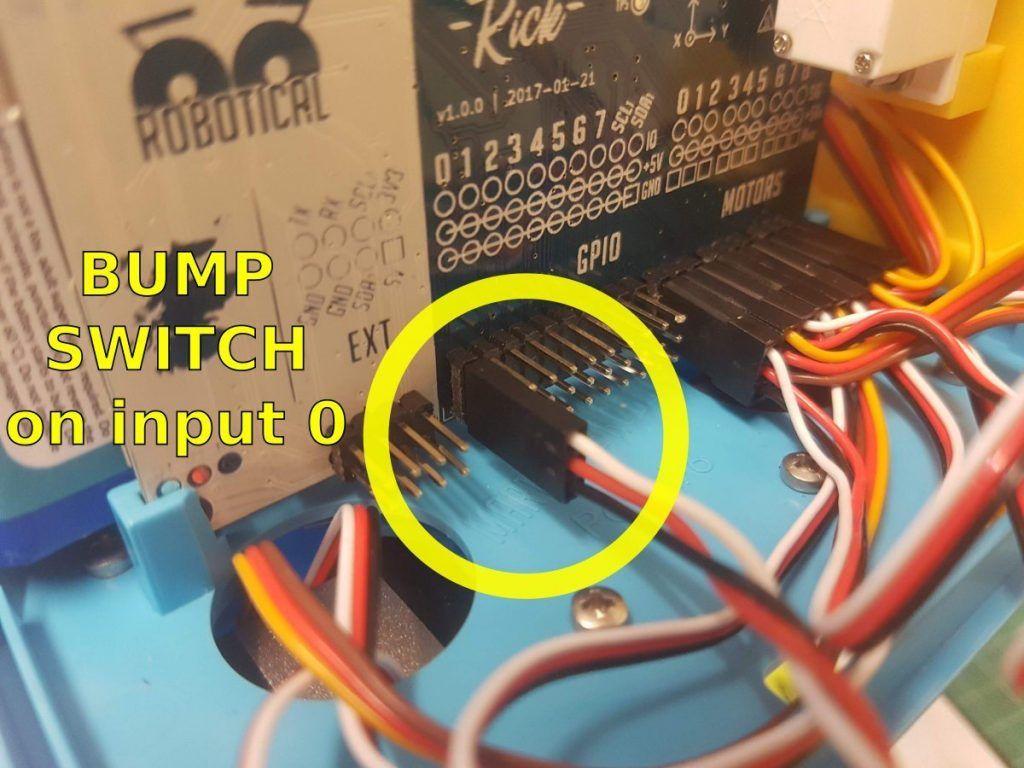
In the photo above, the bump switch is connected to GPIO Input 0, so will be readable in Scratch on input 0
It can be plugged into any of 8 “GPIO” ports on Marty’s control board. It is important that it is plugged in with the white cable at the top.
Question: What is a GPIO port?
Answer: A GPIO port is a “General Purpose Input/Output” port. It is basically a pin (or port) on a circuit board that does not have a specific function assigned to it. This means it can be used to connect additional sensors or other components, like we are doing here.
Don't forget to screw Marty's back on again when you're finished!
Using the Bump Switch in Scratch
We are going to start by looking at how to check whether the bump switch is being pressed or not.
Create a new Scratch 3 project with the Marty the Robot extension added.
Getting Started with Scratch 3
Towards the bottom of Marty’s scratch blocks, you’ll find a block that looks like this:
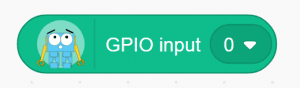
Double click the block to check the current state of the bump switch. A “1” means the bump switch is pressed, and a “0” means it is unpressed.
Waiting for a switch press
One of the simplest ways to use a bump switch in Scratch is to wait until it is pressed before performing an action.
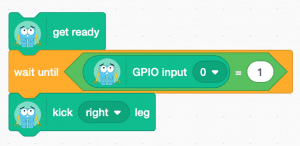
For example, the following block of code will wait until the bump switch is pressed before kicking the right leg. If you want Marty to play football, using a bump switch ensures Marty only kicks a leg when the ball is by the foot.
Tell Marty to get ready.
Select a wait until block from the Control section of the code blocks. Inside this block, you will need the block from the Operators section that checks to see if two quantities are equal to each other. We are going to use it to check to see when the bump switch is pressed - this would be if the output from the bump switch is equal to 1.
Finally, add a block from the Marty the Robot code blocks section to kick Marty's right leg.
Try testing your code! Did Marty kick the ball when you clicked the bump switch that is plugged into GPIO Input 0?
Reacting to an obstacle
Marty has quite slidey feet, and on a slippery table might slide backwards instead of activating the bump switch. This can usually be overcome by putting some sticky tape on the table to give a grippier surface. Make sure you use tape that won’t mark the table!
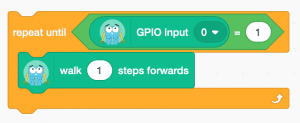
Time to think about how Marty could use a bump switch to avoid an obstacle. Program this simple loop to check if the bump switch is pressed at the end of each of Marty's steps. The loop will repeat to make Marty walk one step at a time until the bump switch is pressed and its output is 1.
The problem with this code is that it only checks if the switch is pressed at the end of the step. In reality, it is most likely that it will be pressed halfway through the step!
To sort this we could write some extra code (we can call it block b) to keep track of the bump switch’s value in a variable that we have called bumped. This code can be run at the same time as the code telling Marty what to do when the bump switch is pressed. This idea of running two blocks of code at the same time is known as running in parallel. Have a go at getting the code below running to see how it works:

This way, when Marty gets to the end of each step, we will know if the bump switch was pressed at any point during that step. That is a much more reliable way to keep track of collisions.
Stop and …
It would be even smarter to be able to react the instant a collision happens and the bump switch is pressed, rather than waiting until the end of the step.
This code might look a bit complicated but a good way to start to understand it is to get the code working and see what it does. The first part of the code has stayed the same as before but the second part of the code that runs in parallel has changed and the forever loop has been replaced by a wait until block and a stop block as shown below:
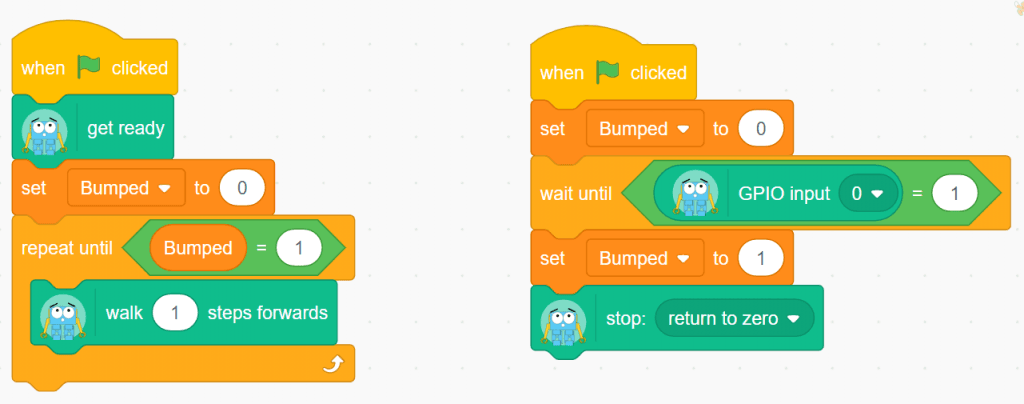
There are a few options for the stop block. “Return to zero” will return Marty to the standing position as directly as possible. You could also finish the current movement, freeze, disable the motors, or pause the current movement (you can resume using the “enable motors” block).
Challenge: FINISH THIS
Earlier we mentioned lots of different ways that bump switches are useful - things like solving mazes or robot vacuum cleaners!
Write some code to make Marty turn around when a bump switch is pressed. Here are some things you will need to think about,
- How will you know when the bump switch is pressed? Look back at the examples that you have already tested in this activity!
- By how much do you want Marty to turn? Find the right code block in the Marty the Robot code drawer!
- What else might Marty do having bumped into something? Angry eyebrows? Make a noise? Add effects to make your code more fun!
I need some help!
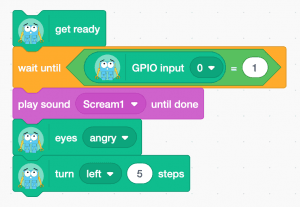
Here is an example of a possible challenge answer! Start by telling Marty to get ready.
We will know when the bump switch is pressed because the output will be equal to 1. We need a block that will wait until this is true.
When the bump switch is pressed, we can make a scream! That should wake everyone up. Go to the sounds tab in the top left hand corner then click on choose a sound in the bottom left corner. Although we chose scream, there are lots of sounds to choose from! Now get a play sound block from the Sound blocks and select the sound you have chosen.
We also selected the eyes block from the Marty the Robot blocks and set it to angry.
Finally, we added a turn block from the same code drawer.
What Next?
You have now just programmed Marty in Scratch to react when a bump switch is pressed. If you want to continue to explore bump switches, think about:
- Where else could you position a bump switch on Marty? Try it out and think of examples of when this might be useful!