

Button-Head Marty
Introduction
We're going to add four big, arcade-style buttons to Marty's head, and write a Python program that will make Marty record a simple sequence of movements that he'll then carry out!
Some of you (older folks) might remember the Big Trak, which was actually the first programmable robot I encountered way back in primary school. This is a bit like that, but we'll be building it for ourselves!
To do this, we're going to design and 3D print a new top-plate for our Marty that has holes to fit our buttons, add a Raspberry Pi Zero with a USB board that lets the Pi read the buttons, and then write a simple Python program to react to the button presses and store up a sequence of steps that Marty will then complete.
Using the Pi instead of Marty's GPIO pins means this project is completely self-contained - once it's done, you won't need a laptop or tablet to run it! It would be simpler to just use Marty's GPIO, but this way lets us use and learn about a few more advanced topics.
What you'll need
- A Marty the Robot v2 (on Kickstarter), or a Marty v1 (you'll need to use the older parts available here, and you'll need to work out how to fit it all together)
- Player X USB Games Controller from Pimoroni (£9.96)
- Some nice big Arcade-Style buttons, we've used these ones (£1.50 ea.) also from Pimoroni, but their whole Arcade Parts Kit (£21) might be easier to use as it includes pre-made wires and some other cool bits
- A Raspberry Pi Zero W (~£9.30) (other Pi variants may also work, but might be a tricky fit)
- A USB Micro B to A cable that you don't mind cutting up and destroying!
- A Soldering iron, some wire and some solder
- Either a 3D Printer to print a new top-plate for your Marty V2, or some cardboard, tape and a sharp knife (Marty v1 users can 3D print a whole new front-face or resort to a big drill bit!)
- I'm going to assume you've done a little bit of Python before, so know how to create programs and run them. If not, not to worry! Quickly run-through our Python beginner's guide to get started.
- An adult to supervise! Staying safe when using sharp and hot things is important.
What will you learn about?
- Some basic TinkerCAD and 3D Printing skills
- Some interesting things we can do in Python with libraries, lists and loops
- Using Pythonwith hardware on a Raspberry Pi
- Some soldering, if you haven't done it before!
Designing the Top-Plate in TinkerCAD
The first thing we need to do is work out how we're going to add the buttons to our Marty. The new Marty v2 has easily changeable top-plates and face-plates, so we're going to design a new top that has holes for four of our arcade buttons. Luckily these buttons just clip in, so there's no need to used screws or glue to hold them in place.
If you're using a Marty V1, start with the Head face part.
If you don't have access to a 3D printer, that's no problem - with some scrap cardboard, you can still make a top plate that fits snugly and will work just as well.
First thing's first, we need to start from something! Click below to download a STL file of the blank top-plate, that we'll modify using TinkerCAD, a simple and free to use CAD software (If you already know how to use another CAD package, you can use that instead if it can read STL files).
Sign up at the above TinkerCAD link. If you've never used TinkerCAD before, I'd recommend following through the beginner tutorial it'll offer you. It only takes about 5 minutes to complete and nicely introduces TinkerCAD's features.
(Here's a link to our TinkerCAD file if you want to compare)
Now we're going to create a project for our top plate. From the Dashboard, click Create a New Design just under My Designs.
TinkerCAD will generate a random name for you, in the top left -- let's change it to somethin sensible, like "Button Head" by clicking the name, typing a new name and then hitting Enter.
Next, you need to import the starter blank Top-Plate template, which you downloaded in the last step.
Click the Import button in the top right of the screen, then select the file you just downloaded. It'll take a second or two to import.
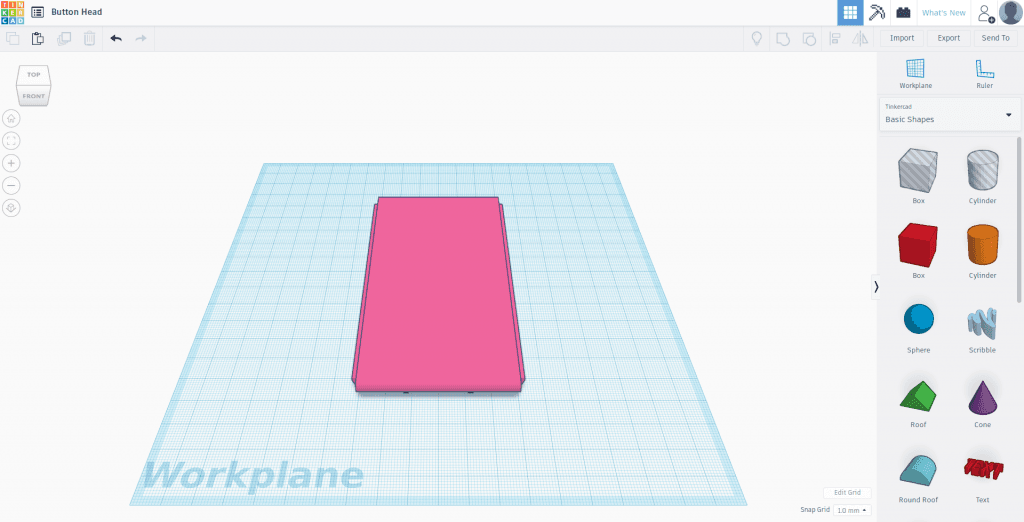
Next, we want to select the plate, and flip it upside-down so the top surface is now on the underside. I also rotated it 90 degrees to the left, and changed the colour to Yellow.
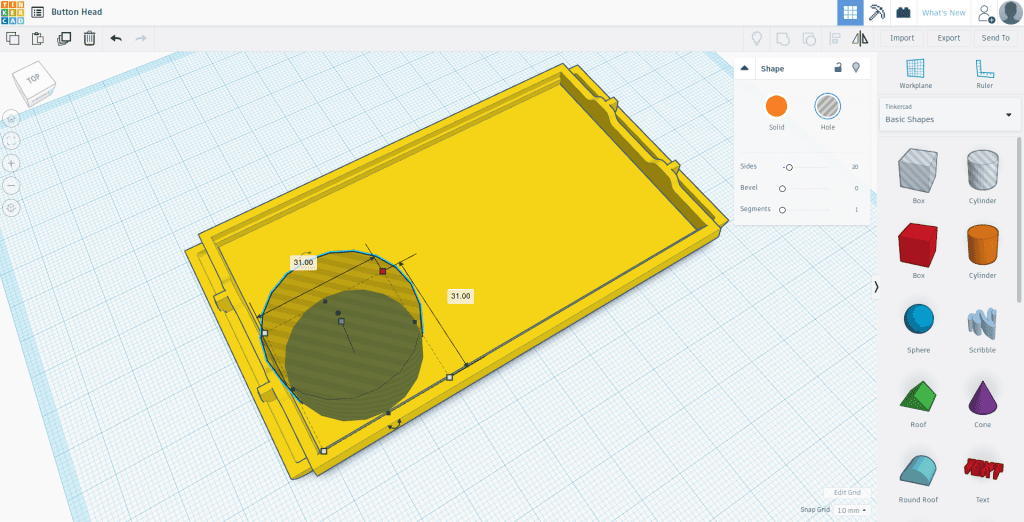
Now, we need to punch four big holes in this top-plate.
Take care to measure the width of your physical buttons, with a ruler or calipers if you have them. Ours were about 30 mm in diameter, so we'll make the holes a tad larger at 31 mm so that its not too-tight a fit - remember that 3D printers often make holes slightly smaller and pegs slightly larger.
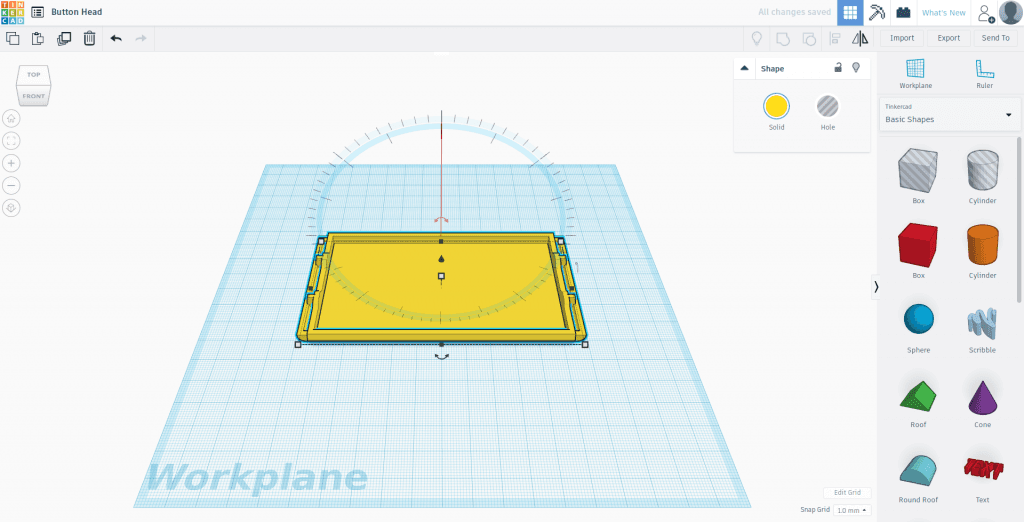
Take a Cylinder from the Basic Shapes menu on the right, and place it somewhere on the flat portion of the plate.
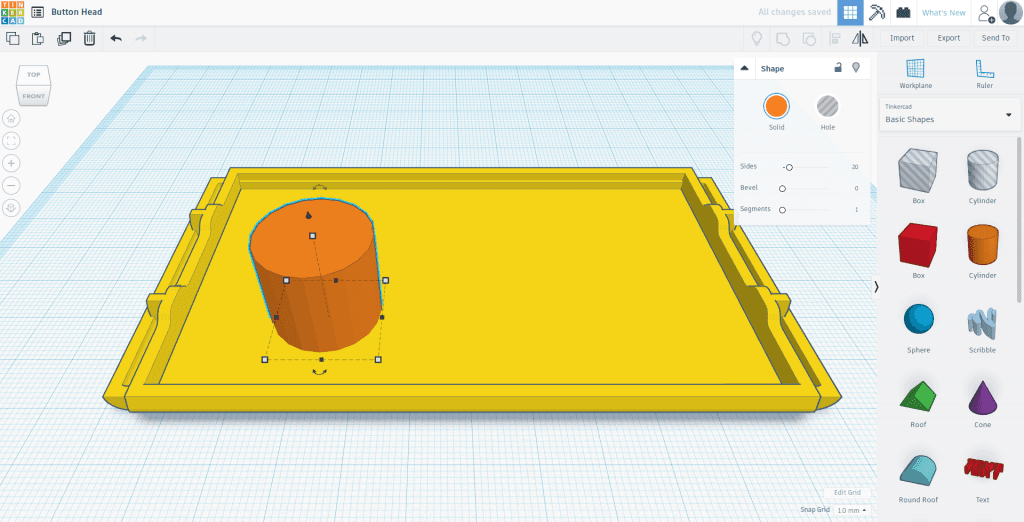
Change the shape so that it is a Hole and not a Solid.
Now we need to scale the hole so it's the right size - click the white square handle on the horizontal plane, and drag it until the X and Y dimensions show 31 mm each.
It's a good idea to also check that the size of the top plate in your model is the same size as a real plate, which measures about 67 mm x 117 mm. You shouldn't need to resize it.
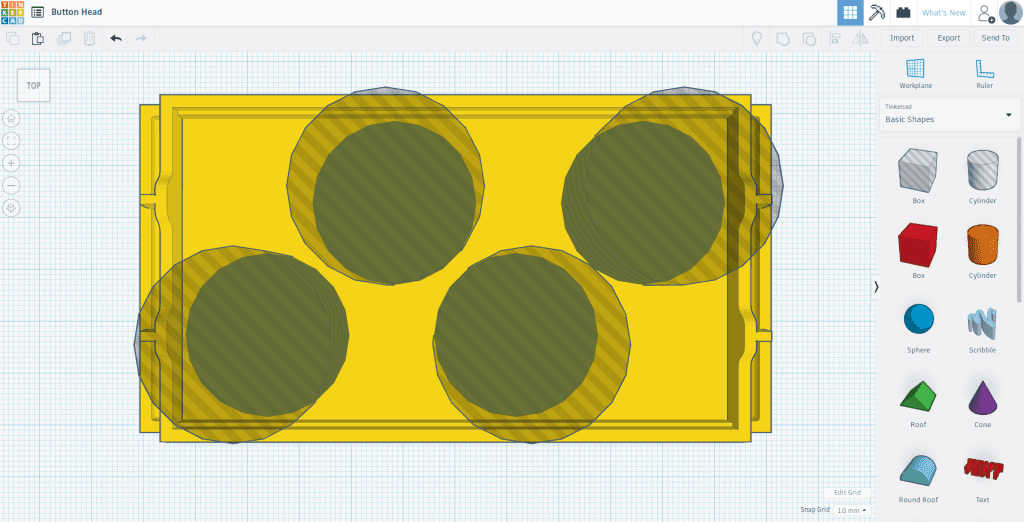
Once you've got one hole the right size, you can use the Duplicate tool in the top right, or press Ctrl+D to make three more.
The arrangement I've gone for is shown below, the corner button holes are just placed by eye, making sure they don't hit the walls. The two inner holes are placed 47 mm to the side of the corner holes.
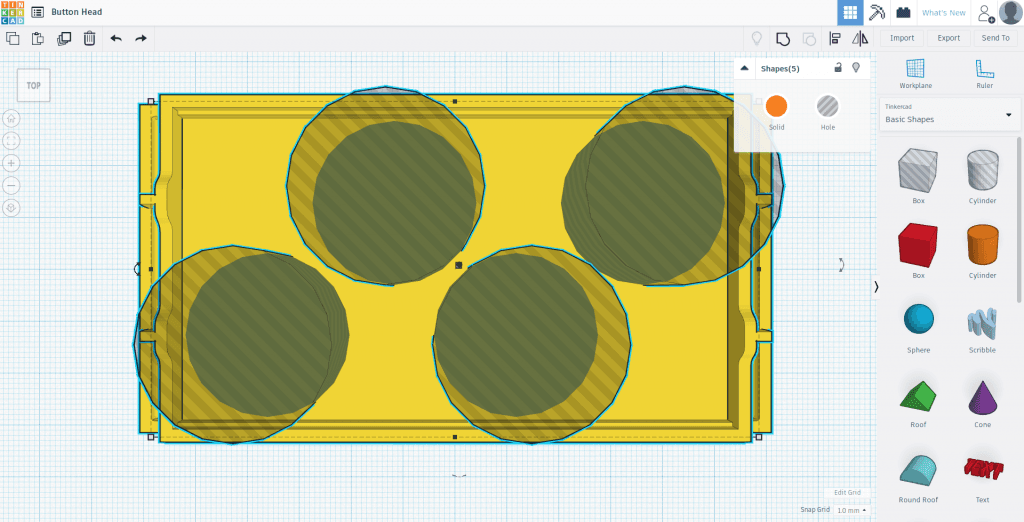
The last step is to select all four holes and the top plate, and Group them together, using Ctrl+G which will, after a second, leave you with a top plate with four big holes!
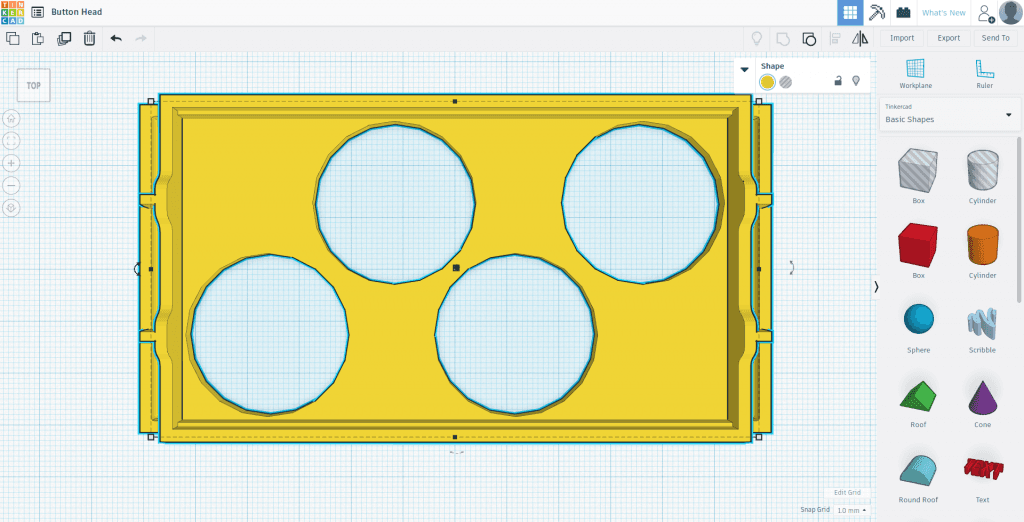
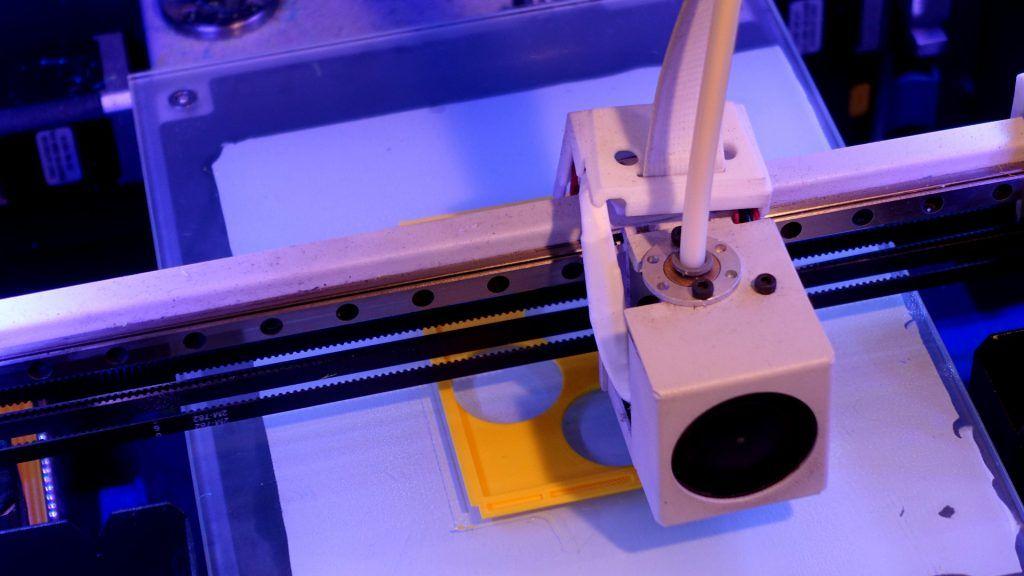
Now we're all done, you can Download your file for 3D Printing as a STL. Import it into the slicer you normally use with your printer, and get it printing!
Download by going back to the TinkerCAD Dashboard, clicking on the project's icon and then the big Download button.
Here's our top plate if you want to check it against yours or just print it instead: Pre-Made Top Plate with Button Holes STL Download
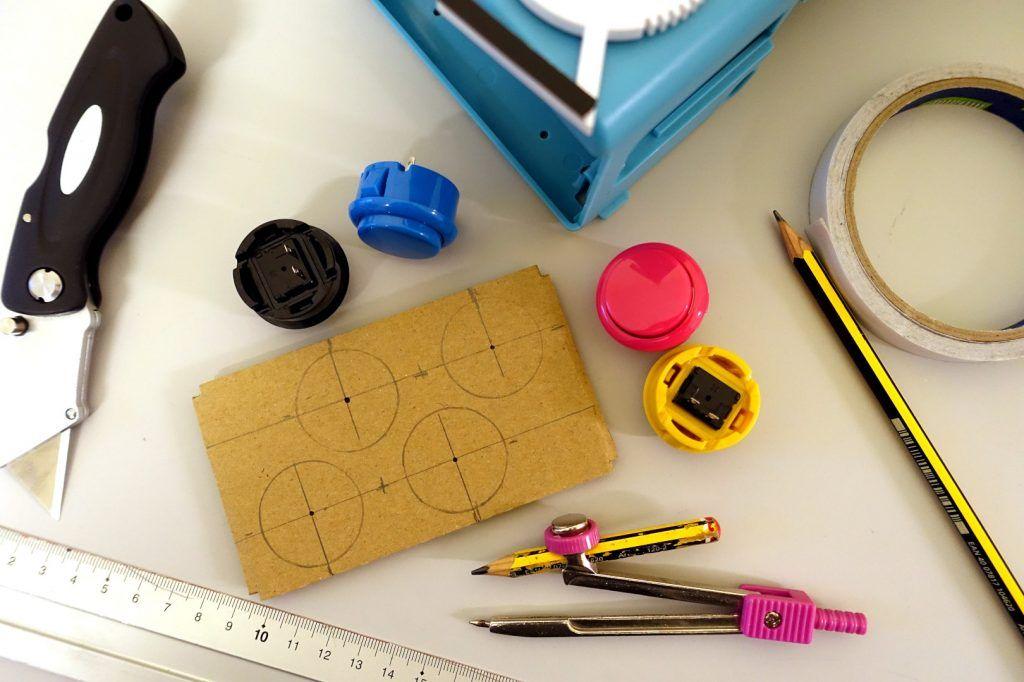
As mentioned earlier, you can also use cardboard to assemble a top-plate that fits snuggly - here's an example one we made quickly using a box cutter, an old Amazon box, a pair of compasses and some double-sided tape to stick two sheets together to thicken the plate up and give it a lip to slot in:
Assembling the Electronics
Now that we have our Top Plate, we need to fit the buttons and wire in the Raspberry Pi and Player X controller.
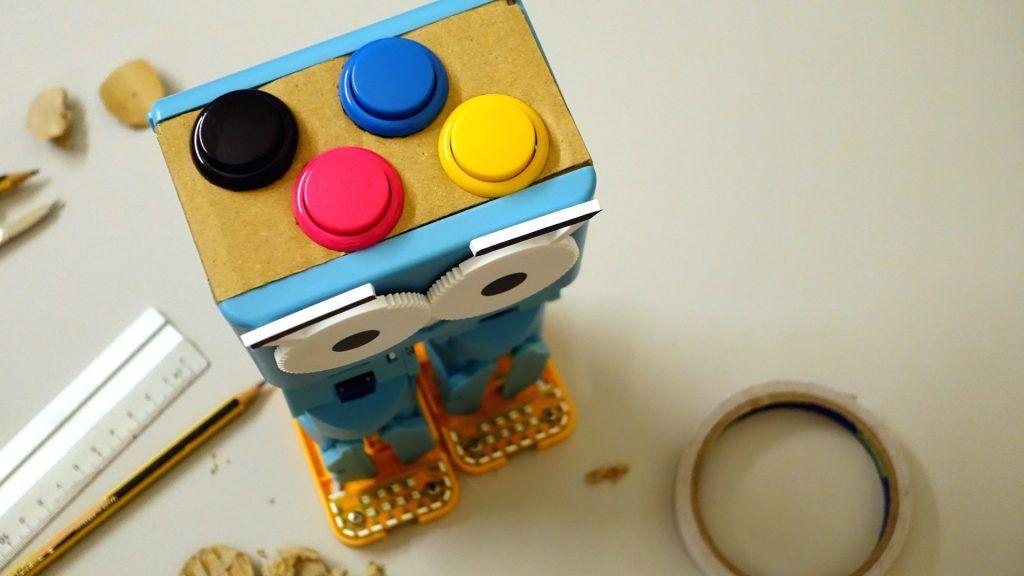
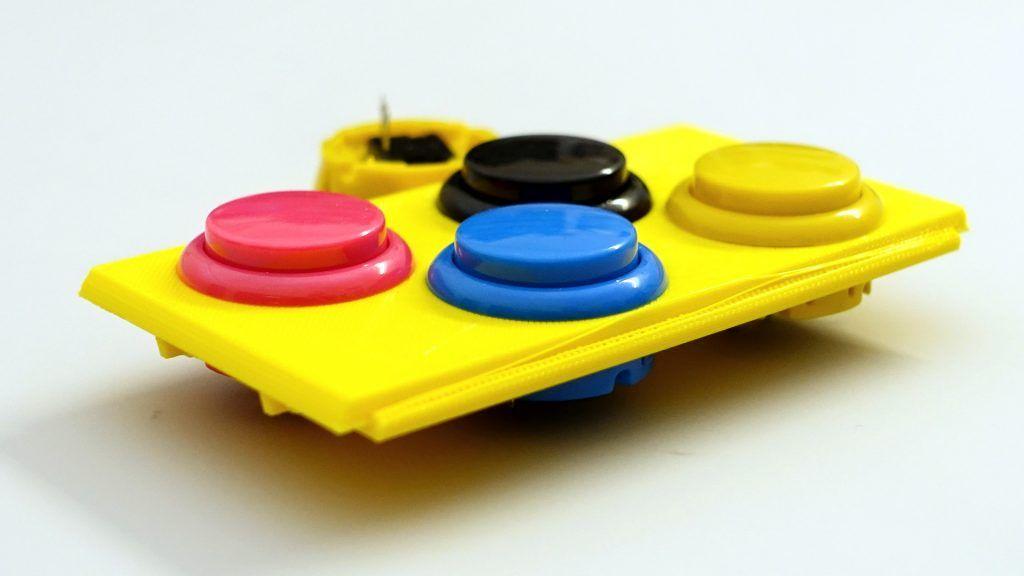
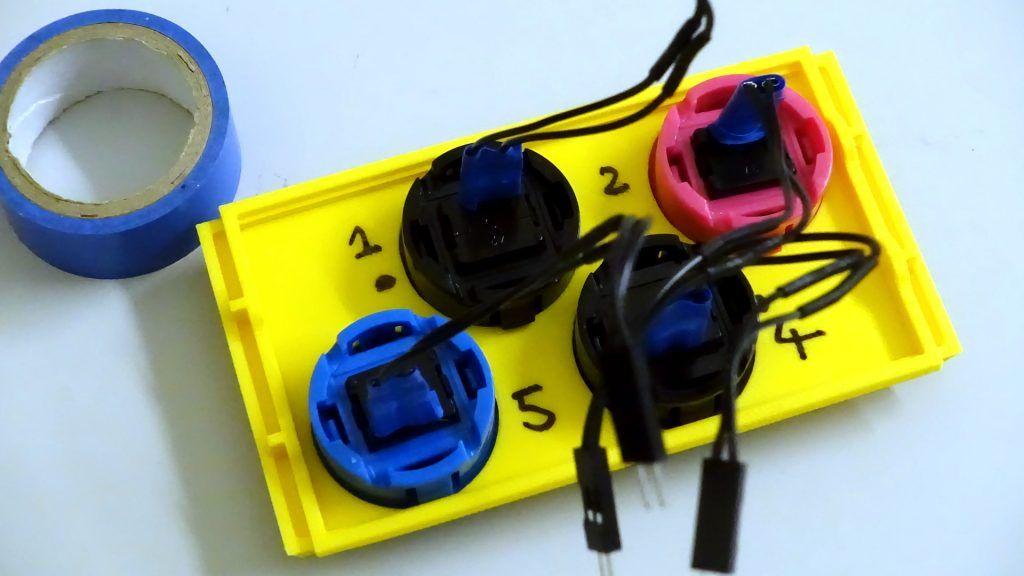
Pop four buttons in to the plastic part we just 3D printed:
Flip it over, and add wires to each of the tabs on the buttons.
I've used cut-down cables provided in the Pimoroni Arcade parts kit that have pins on one end and a connector that fits the tabs on the other, but soldering wire straight on to the tabs will also work (single-stranded solid-core wire would be easiest to use here).
I'd also recommend putting some electrical tape over the tabs to prevent any accidental shorting later.
Now we're going to ge the Raspbery Pi and Player X controller working together.
I'll assume you've get Raspbian running on the Pi already. To check it works together, plug the Player X in to the Pi using the Micro USB cable, using a hub or OTG adapter as you usually would to plug stuff in to a Zero. The Official Pi Keyboard is a good choice, as it has an integrated hub.
Set up SSH or VNC and a network connection so you can still access the Pi when it's installed inside Marty's head.
A white light should come on when the Player X is plugged in. From the console (Terminal) on the Pi, type the following, then hit enter:
1dmesg
And you should see something like this:
1 2 3 4 5 6 7 8 9 10[2790713.044802] usb 1-10: new full-speed USB device number 35 using xhci_hcd [2790713.172156] usb 1-10: New USB device found, idVendor=16d0, idProduct=0ec4, bcdDevice= 2.00 [2790713.172162] usb 1-10: New USB device strings: Mfr=1, Product=2, SerialNumber=3 [2790713.172165] usb 1-10: Product: Picade Player X USB [2790713.172168] usb 1-10: Manufacturer: Pimoroni Ltd [2790713.172170] usb 1-10: SerialNumber: 00000000001A [2790713.175617] cdc_acm 1-10:1.0: ttyACM0: USB ACM device [2790713.177228] input: Pimoroni Ltd Picade Player X USB as /devices/pci0000:00/0000:00:14.0/usb1/1-10/1-10:1.2/0003:16D0:0EC4.0013/input/input45 [2790713.177633] input: Pimoroni Ltd Picade Player X USB Consumer Control as /devices/pci0000:00/0000:00:14.0/usb1/1-10/1-10:1.2/0003:16D0:0EC4.0013/input/input46 [2790713.230099] hid-generic 0003:16D0:0EC4.0013: input,hidraw1: USB HID v1.11 Gamepad [Pimoroni Ltd Picade Player X USB] on usb-0000:00:14.0-10/input2
The key bits we're looking for are "New ... USB device found" and "Picade Player X USB" which lets us know the system has identified the board. If you don't see anything, check your connections and try a different USB cable. After soldering everything together later, this is a good sanity check to run again if it's not working for you.
Make sure the Player X and Pi are now powered-off so we can solder our stuff together.
We're going to cut-up and solder a USB cable directly on to the Pi Zero, to make it as small as possible so it fits inside Marty's head!
Carefully cut the bigger USB-A end of the cable off, leaving yourself about 10 cm of slack on the Micro B end.
Next, remove the outer insulating layer on the cable, taking care not to cut in to the four smaller wires inside the cable, so you're left with a plug and four loose wires coming out the end of it (You can see what I mean in the image below).
The Pi Zero has some circular golden pads on its underside, which we can get the four USB signals from: +5 V, Ground, D+ and D-.
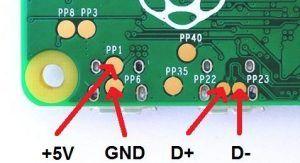
In a USB cable, +5 V is red, GND is black, D+ is green and D- is white.
Solder the USB wires on to these pads, note that you can also get +5V and GND from the Pi's GPIO header (pinout)
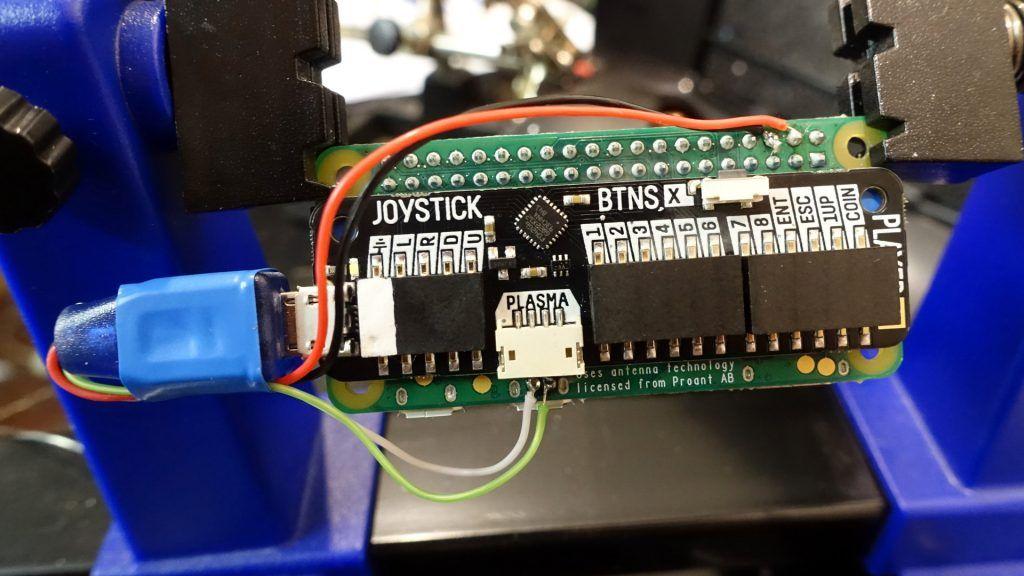
I also found the Player X worked well stuck to the back of the Pi - just make sure its well insulated, with a layer of electrical tape between the two.
Also notice I got the D+ and D- the wrong way around there - D'oh! I fixed it after getting the picture. I also found the circular pads to be more reliable for powering the Player X than the GPIO pins.
As we've soldered to the Pi Zero's USB port, we now can't plug anything in whilst the Player X is plugged in, as USB doesn't allow multiple connections without a hub. If you do need to plug a keyboard or whatever in, just gently unplug the Player X.
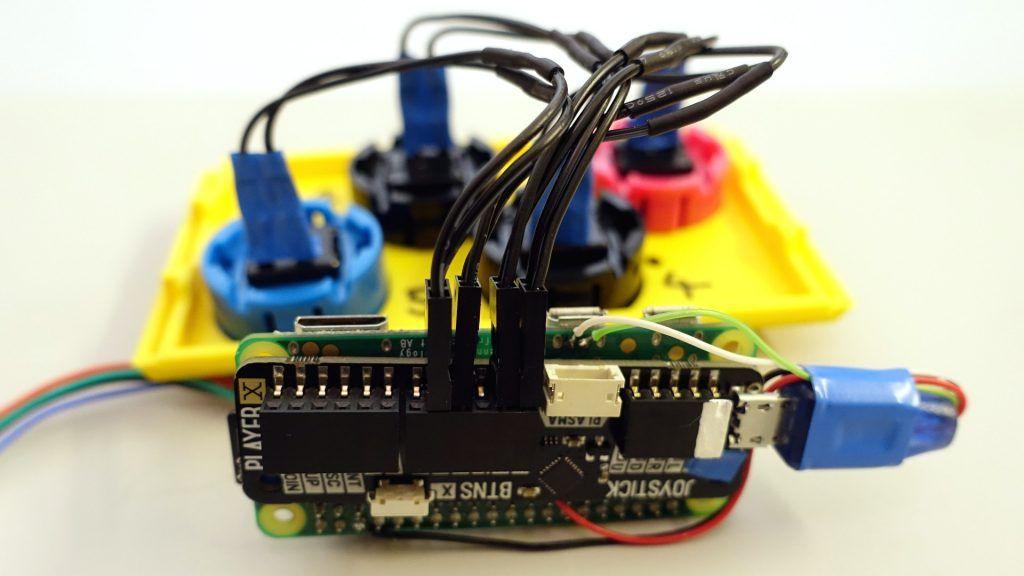
Plug the four buttons in the the Player X. I found that buttons number 1, 2, 4 and 5 were the SOUTH, EAST, NORTH and WEST gamepad codes, so I used them. As thay're just dumb switches, it doesn't matter which way around they go (polarity).
Lastly, plug the Pi in to Marty using the standard Pi connection cable.
Making it Do with Python!
Now we can power up Marty and the Pi together!
SSH or VNC in to the Pi, whichever you prefer, and we'll get started on the Python code...
To use the Player X from Python, we'll use the wonderful inputs library, and we'll use the familiar martypy with Marty.
Inputs lets you listen to a Human Interface Device like a game controller or keyboard andlet you react to and code with each button or key press it gets.
I'll assume you're happy setting up a simple Python project, if not check out our Getting Started with Python Guide
1$ pip install inputs martypy ipython
I'd recommend installing iPython as it's a great interactive way to play with your Python program as it's running. Start ipython in a console, and import the inputs library.
1 2 3 4$ ipython Python 3.7.4 (default, Jul 9 2019, 16:48:28) Type 'copyright', 'credits' or 'license' for more information IPython 7.8.0 -- An enhanced Interactive Python. Type '?' for help.
In [1]: import inputs
In [2]:
If you type `inputs.devices.gamepads` you'll see a list of all the devices `inputs` has found. You should see something like this when you've got the Player X plugged in:
1 2In [2]: inputs.devices.gamepads Out[2]: [inputs.GamePad("/dev/input/by-id/usb-Pimoroni_Ltd_Picade_Player_X_USB_00000000001A-if02-event-joystick")]
(If you don't get anything, try gently re-plugging the Player X, the device detection can sometimes be a little finnicky. Also make sure you re-import inputs or restart iPython as it only checks once for devices.)
We can write a quick test inside iPython to see what we get when we start pressing buttons:
1 2 3 4 5In [3]: while True: ...: events = inputs.get_gamepad() ...: for event in events: ...: print(event.ev_type, event.code, event.state) ...:
Hit enter, and the loop will wait for an event. Press a button, and you'll see
1 2 3 4 5 6Misc MSC_SCAN 589825 Key BTN_SOUTH 1 Sync SYN_REPORT 0 Misc MSC_SCAN 589825 Key BTN_SOUTH 0 Sync SYN_REPORT 0
This may look like a fair bit of info, but I promise it all makes sense!
Each line is a different event . The ones we're mostly interested in are the Key events, which tell us their event.ev_type is Key, meaning this event is telling us a key (or button, in this case) was pressed; the event.code tells us which key was pressed, here we got BTN_SOUTH, and the event.state is 1 when the button is preseed down, and 0when it is released again. The other events shown just tell us that the device synced with our computer (i.e. sent something) and aren't of interest here.
Now we understand how to get events from the Player X in Python, we need to decide how to Make Marty do something based on them!
Our idea was to let you queue up actions that Marty shopuld take, using each button for a different direction, and then to use a special key-combo to tell Marty to go.
To do this, we'll need to be able to save commands up and then run through them in order
The Python program wrote is below - it's fairly well commented so you can get an idea of what it does and how. Give it a go as-is, or make your own from scratch!
It'll listen to the buttons to a sequence of steps, like Forward, Forward, Right Forward, Left Forward, Backward, and then you press Forward, Right and Backwards at the same time to make it go.
You can experiment with changing what's done with the list of actions, or what each action does. We had fun changing how many steps would be taken for each action - the buttons are pretty satisfying to press, so changing it to only one step per press was fun!
1 2 3 4 5 6 7 8 9 10 11 12 13 14 15 16 17 18 19 20 21 22 23 24 25 26 27 28 29 30 31 32 33 34 35 36 37 38 39 40 41 42 43 44 45 46 47 48 49 50 51 52 53 54 55 56 57 58 59 60 61 62 63 64 65 66 67 68 69 70 71 72 73 74 75 76 77 78 79 80 81 82 83 84 85 86 87 88 89 90 91 92 93 94 95 96 97 98 99 100 101 102 103 104 105 106 107 108 109 110 111 112 113 114 115 116 117 118 119 120 121 122 123 124 125 126 127 128 129 130 131 132 133 134 135 136 137 138 139 140 141 142 143 144 145 146 147 148 149 150 151 152 153 154 155 156 157#!/usr/bin/env python import sys import time import inputs import martypy import argparse from datetime import datetime if len(inputs.devices.gamepads) == 0: raise Exception("Can't find any Gamepads!") # Argparse is a convenience library that makes it easy to give the Python program # information from the command line. parser = argparse.ArgumentParser(description='Code Marty with some big Arcade buttons!') parser.add_argument('ip') args = parser.parse_args() # Connect to Marty as you normally would in martypy, over the WiFi network marty = martypy.Marty('socket://{ip}'.format(ip=args.ip)) marty.motor_protection(False) # These two variables are where we're going to store # info about button presses: actions = [] last_state = dict() def process_event(event): ''' Do something with an `inputs` event ''' # Convert the timestamp in to a Python date object t = datetime.fromtimestamp(event.timestamp) # For debug: print(event.ev_type, event.code, event.state, t) # We're only interested in Button (i.e. Key) press events: if event.ev_type == 'Key': # Save the button press to the end of the list actions.append((event.code, event.state, t)) if event.state == 1: print(event.code) # And remember that we just pressed or released this button last_state[event.code] = event.state return event def exit_condition(): ''' This function works out if we have seen the 'magic' button combination that should stop us from listening to the buttons and saving moves, and start moving! The value returned here will be used to break out of a `while` loop, so this function returns `True` to mean "keep going", and `False` to mean "stop looping and exit" The magic code is to press NORTH + SOUTH + EAST at the same time ''' global last_state if last_state.get('BTN_EAST', 0) and last_state.get('BTN_SOUTH', 0) and last_state.get('BTN_NORTH', 0): # Reset the state so we don't accidentally exit again next event! last_state = dict() return False else: return True def save_loop(): ''' Grab a Gamepad instance and listen for events, saving them to a list ''' events = inputs.get_gamepad() for event in events: process_event(event) return exit_condition() def do_action(action): ''' Takes an action from the list of actions we build up and makes Marty do something! ''' # "Unpack" the three bits from the `action` tuple button, state, timestamp = action if state == 0: # Do actions on button down, not up return None if button == 'BTN_NORTH': marty.eyes(30, 200) marty.walk(8, step_length=30, move_time=900) time.sleep((8.0 * 0.9) + 0.2) if button == 'BTN_SOUTH': marty.eyes(-50, 400) marty.walk(9, step_length=-30, move_time=1200) time.sleep((9.0 * 1.2) + 0.2) if button == 'BTN_EAST': marty.eyes(0, 400) marty.walk(6, turn=-120, step_length=0, move_time=600) time.sleep((6.0 * 0.6) + 0.1) if button == 'BTN_WEST': marty.eyes(0, 400) marty.walk(6, turn=120, step_length=0, move_time=600) time.sleep((6.0 * 0.6) + 0.1) def main(): ''' Does one iteration of out program ''' global actions print("######") print("Listening for button presses...") while save_loop(): # First, build up a list of action continue print("######") print("Doing actions!") marty.enable_motors() marty.hello() time.sleep(1) for action in actions[:-3]: # Then, do the actions *but*, skip out the last 3 # as they are our magic 'go' sequence do_action(action) # Celebrate as we've arrived! marty.celebrate() time.sleep(4) # Reset actions list actions = [] if __name__ == '__main__': # This is a bit of Python magic, it will run if we run # this file directly, but not if we import it as a module try: while True: main() except KeyboardInterrupt: # Stop running if we get Ctrl+C'd sys.exit(0)
What Next?
You now have a cool way to interface buttons with Marty - where else could you put buttons? What other types of button, sensor and switch could you use? You could use the same hardware and a powerbank or other battery to make a 3D Printed custom controller for Marty!
With Marty 2, it's even easier to 3D print custom parts, making swappable top plates and face plates. We'd love to see what you make - let us know on Twitter @RoboticalLtd