


Giving Marty a Button
Introduction
In this lesson you'll learn how to wire up a button to Marty's Raspberry Pi and then write some code to create a reaction to the button being pressed.
What you will need
- Marty the Robot with a Raspberry Pi - Instructions for that found here: https://robotical.io/learn/article/7/Adding%20a%20Raspberry%20Pi%20to%20Marty/Introduction/
- A large push button switch like this: https://uk.rs-online.com/web/p/push-button-switches/7346704/
- Two female jumper cables like these: https://www.amazon.co.uk/Conductor-Female-Jumper-Color-Ribbon/dp/B00ATMHU52
- A wire stripper
What will you learn about?
- How to wire a button to a Raspberry Pi
- How to write code to react to button presses
- What a variable is
Extra information for educators
Some help will need to be given to strip the cables
Wiring the button
The first thing we have to do is wire up our button
Strip one end of your cable to expose the copper wire. Make sure you leave the female end on (the one with the hole) as this will be plugged into your Pi
Loop the copper ends of your cables through the holes in your button like this. Twist them both to make them secure. Make sure they're not touching!
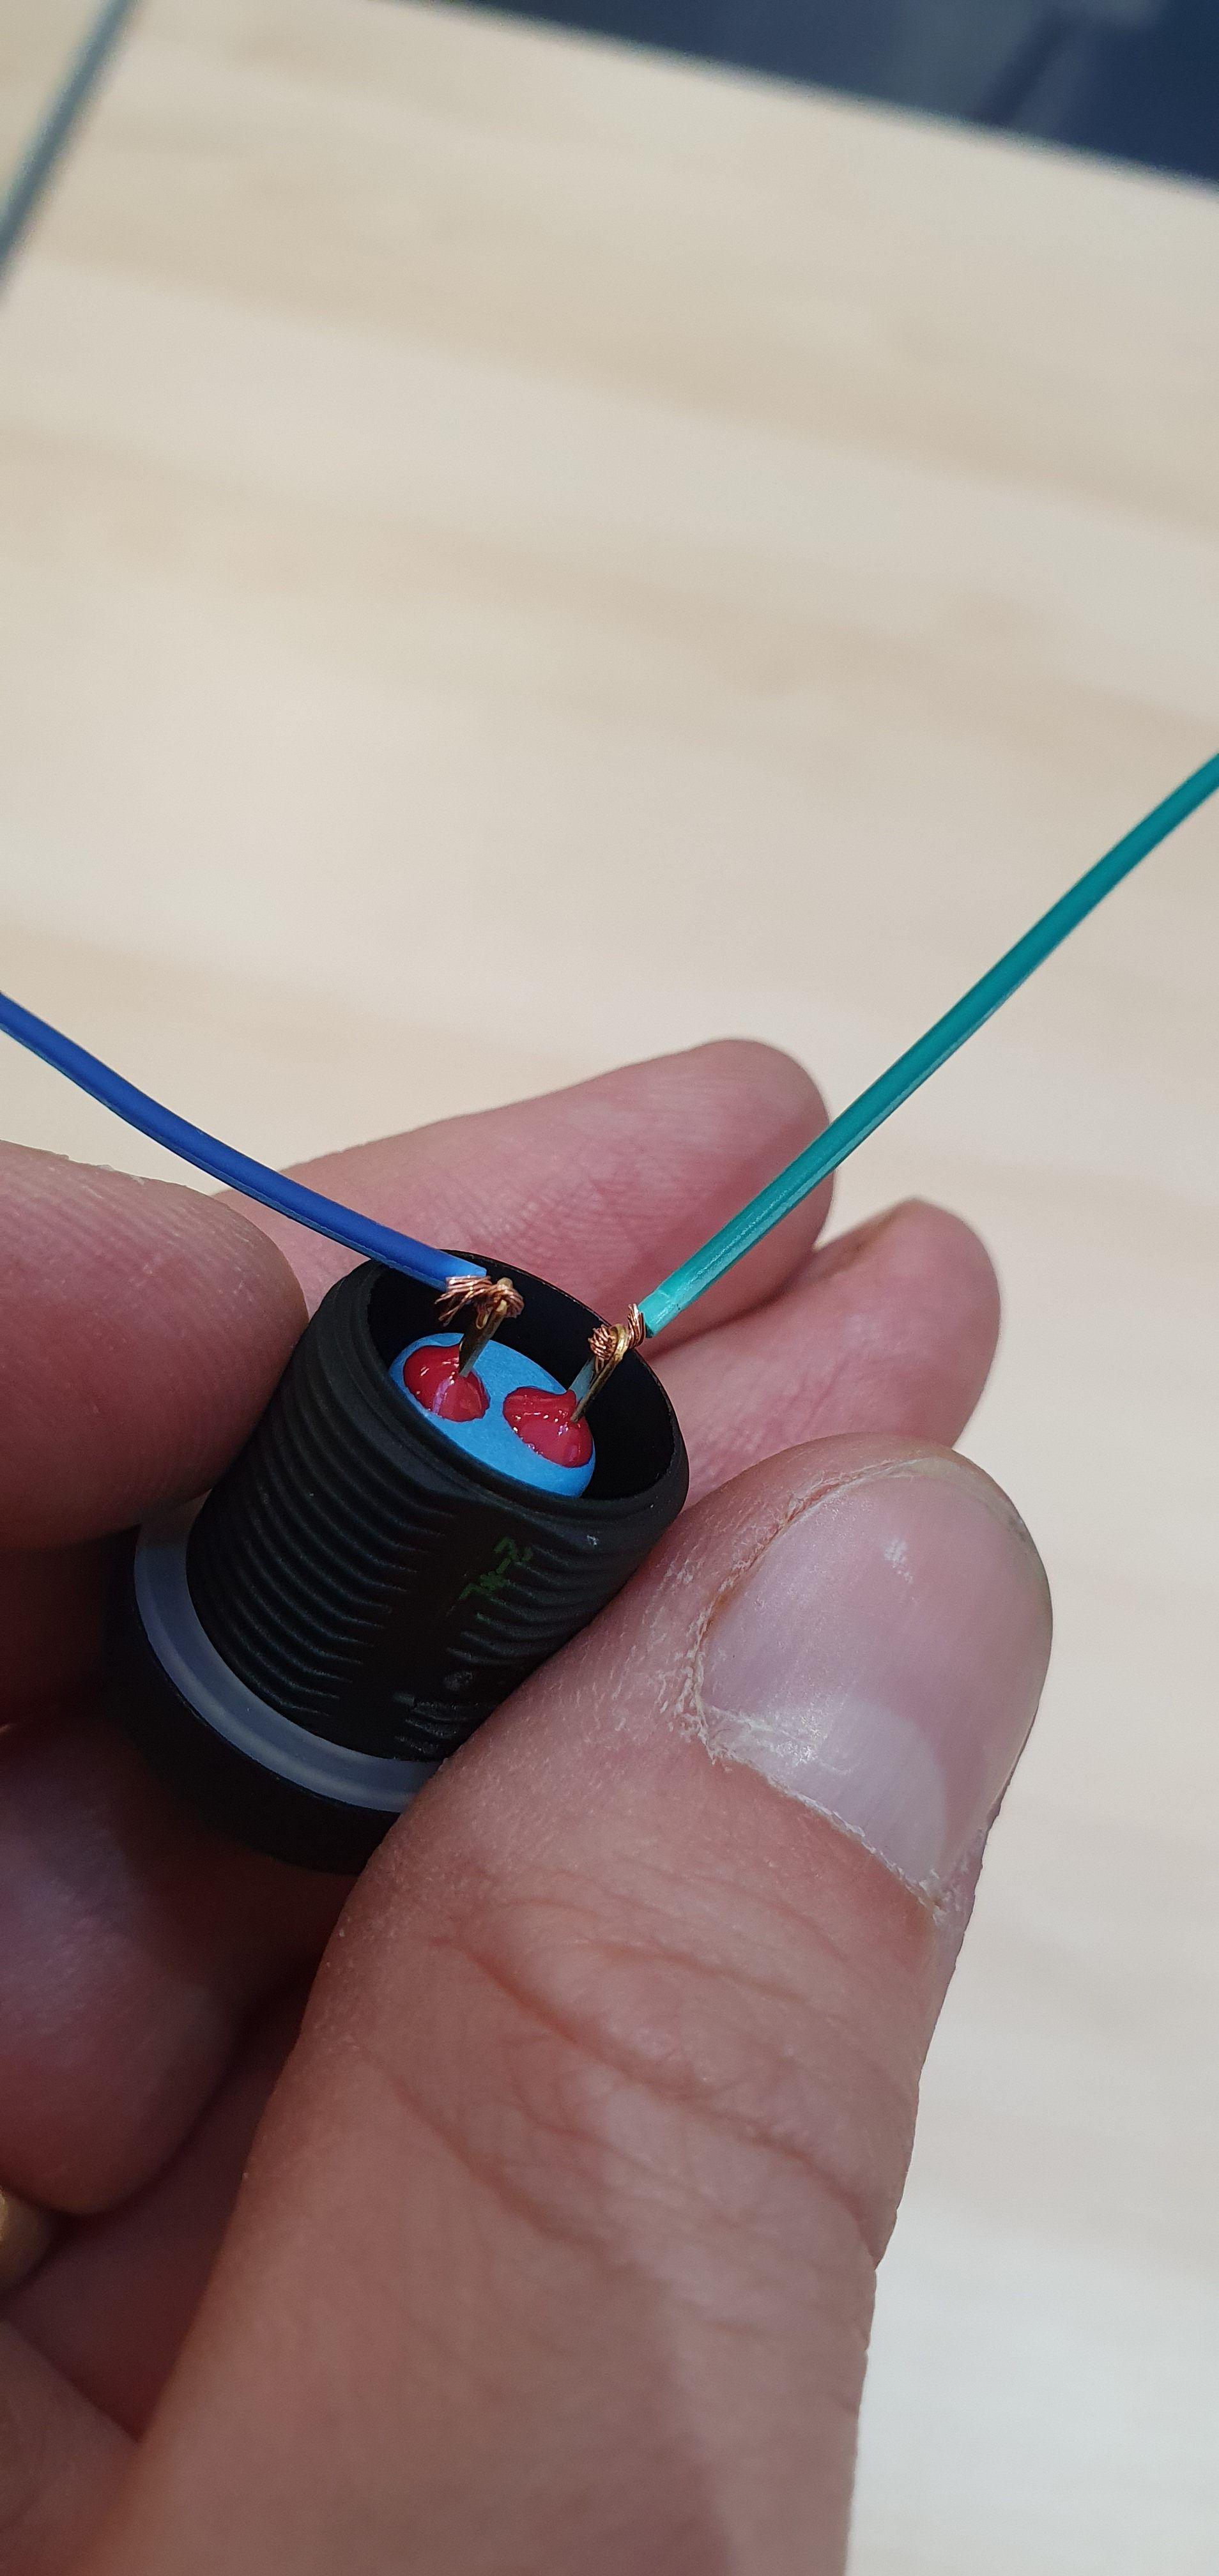
Pass the cables through the front of Marty's mouth. You can use Blu-Tak to secure your button in place,

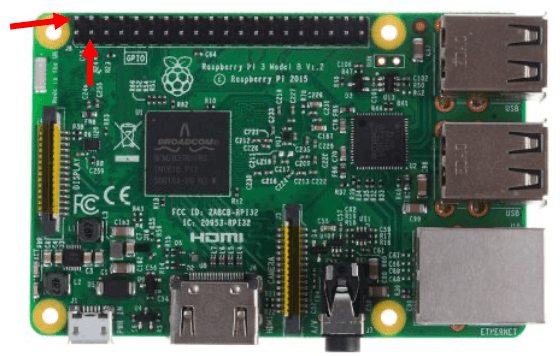
Now wire the female end of your jumper cable into your Pi on the pins shown below. You are connecting to the 5 volt pin and pin number 2,
Coding your button
Once our button is in place we then have to write the code to make Marty react to the button press.
Using your preferred Python editor, type in the below code. Remember to change the IP address (192.168.x.x) to your Marty's address (you can use the Marty the Robot app to find out the IP address of your robot).
The code below sets up pin number 2 as an input and constantly (while True) checks if the button has been pressed,
import martypy, time, RPi.GPIO as GPIO commandNumber = 0 GPIO.setwarnings(False) GPIO.setmode(GPIO.BOARD) GPIO.setup(2, GPIO.IN, pull_up_down=GPIO.PUD_DOWN) #insert the IP address for the Marty you want to connect to marty = martypy.Marty('socket://192.168.xx.xx') marty.hello() marty.eyes(100,1500) time.sleep(1) while True: if GPIO.input(2) == GPIO.HIGH: if commandNumber == 1: marty.celebrate() elif commandNumber == 2: marty.circle_dance('left', 4000) elif commandNumber == 3: marty.circle_dance('right', 4000) commandNumber = 0 #if at number 3 - set it back to number 0 commandNumber = commandNumber + 1
Challenge: Moving marty's arms
We're now going to try extending the code to do more actions.
Add some more code to your program so that if you push the button 4 times Marty waves the right arm.
Some things to think about:
- How can you code for commandNumber == 4?
- Where will the code for setting the commandNumber back to 0 go?
The code below is required for waving Marty's right arm
Now, can you change the angle of the move and the time it takes to complete the action?
marty.arms(0,90,1000)
Now, can you change the angle of the move and the time it takes to complete the action?
I need some help!
import martypy, time, RPi.GPIO as GPIO
commandNumber = 0
GPIO.setwarnings(False)
GPIO.setmode(GPIO.BOARD)
GPIO.setup(2, GPIO.IN, pull_up_down=GPIO.PUD_DOWN)
#insert the IP address for the Marty you want to connect to
marty = martypy.Marty('socket://192.168.xx.xx')
marty.hello()
marty.eyes(100,1500)
time.sleep(1)
while True:
if GPIO.input(2) == GPIO.HIGH:
if commandNumber == 1:
marty.celebrate()
elif commandNumber == 2:
marty.circle_dance('left', 4000)
elif commandNumber == 3:
marty.circle_dance('right', 4000)
elif commandNumber == 4:
marty.arms(0,90,1000)
commandNumber = 0 #if at number 4 - set it back to number 0
commandNumber = commandNumber + 1
Extending your program
Using what you've learned in this task and previous tasks, think about how you might extend this code futher. Can you:
- Add another button into Marty to perform a different type of action?
- Use the Python documentation here to complete new moves?
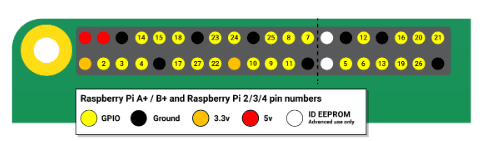
If you're thinking about wiring in more buttons to Marty you'll have to consider where you're going to place your pins on your Raspberry Pi. Using the image below you can decide where to place your cables. You'll need to use one of the 3.3v pins and then choose a GPIO pin
Using the Python documentation on the link below can you extend the program to do different actions?
http://docs.robotical.io/python/martypy/
What Next?
You have now learned how to wire a button to your Raspberry Pi and write Python code to make the button do something. Why don't you now try:
- Wiring an LED into Marty
- Wiring buttons into each of Marty's hands to perform different actions