

Marty'S Perfect Parking
Introduction
Using Scratch 3 and the distance sensor add-on, you will create an interactive program where you use information from the sensor to control a sprite on screen, extending the system to give you audio and visual information so Marty can help you perfect your parking.
Using information from Marty's distance sensor, an on-screen sprite will show you the position of an object from the distance sensor and tell you to move forwards or backwards until you are parked perfectly. You will add alarm sounds and Marty will help with arm signals!
what you will need
- A Scratch 3 compatible device
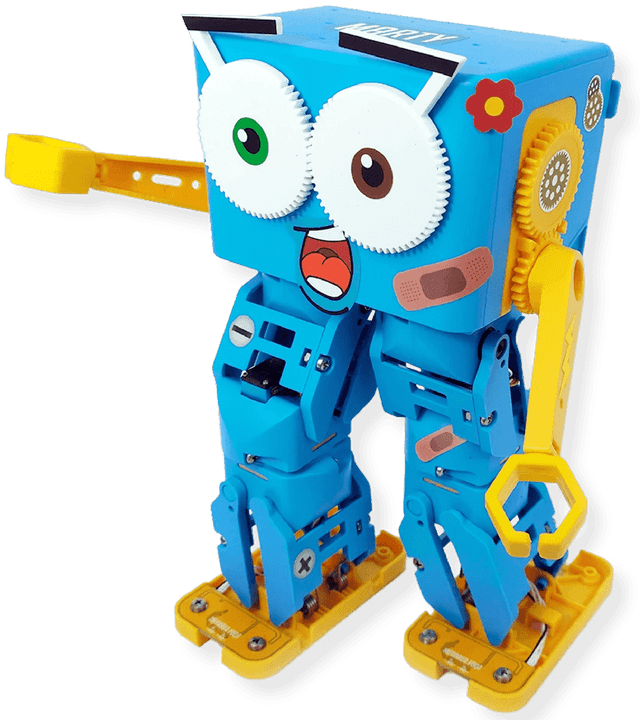
- Marty the Robot
- Distance sensor add-on
What will you learn about?
- How to use the distance sensor to control an on-screen sprite
- How to use variables, operator and control blocks
- How to add music blocks
extra information for educators
This activity can be linked to concepts covered in the lesson packs Responding to our Environment and Programming Concepts 2.
Lesson Pack – Responding to Our Environment
Lesson Pack – Programming Concepts 2
Using the distance sensor
You can find a helpful guide to the distance sensor in the distance sensor introduction activity. This also gives you instructions for connecting the distance sensor to Marty.
When the distance sensor is connected, you are ready to start. Remember not to cover the distance sensor! The distance sensor sends out infrared light which hits the object in front of the sensor. Some infrared light bounces off the object back to the receiver in the sensor. This light is used to estimate far away the object is from the sensor.
Create a new Scratch 3 project with the Marty the Robot extension added.
Getting Started with Scratch 3
In your project, the distance sensor will appear as proximity sensor in the Scratch 3 interface. If you click on the tick box next to proximity sensor (as shown below) then the sensor measurements will appear on your screen. If you want to hide the sensor readings, then click on the box again.
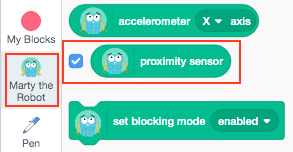
The proximity sensor readings will change as an object is moved towards and away from Marty.
Hint: Try moving an object (or even just your hand) in front of the sensor and look at the sensor readings on screen. What happens to the readings when the object is close to the sensor? What about when the object is far away?
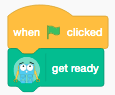
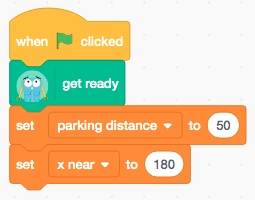
Time to get programming! Start with a when green flag clicked event block and then tell Marty to get ready.
Defining the variables
A variable is a quantity that can be measured and its value can be changed. We are going to set the values of two variables to help us use distance (proximity) sensor readings to control a sprite on screen.
The first variable is used to set our ideal parking distance from the distance sensor.
The second variable is to do with positioning the sprite on screen to show how close our object is getting to Marty.
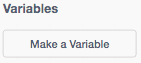
You can make a new variable by clicking on Make a Variable in the Variables section of the coding blocks.
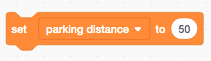
Make a variable called parking distance. We have set parking distance to 50. This determines how far from the distance sensor we want our object to park.
Hint: If you decrease parking distance, your ideal parking spot will be closer to Marty but if you increase the parking distance then your ideal parking spot will be further away.
Make another variable called x near. This will be used to show on screen how close the sprite is getting to Marty's distance sensor. The x in the variable name relates to the x position of the sprite on screen. The screen is a 480 by 360 rectangle. The x position can be any value from -240 (sprite as far left as possible) to 240 (sprite as far right as possible).
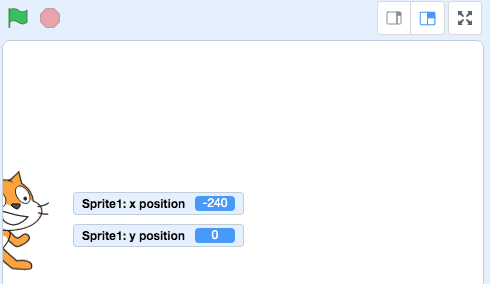
This is what you see on screen if the x position of the sprite is -240.
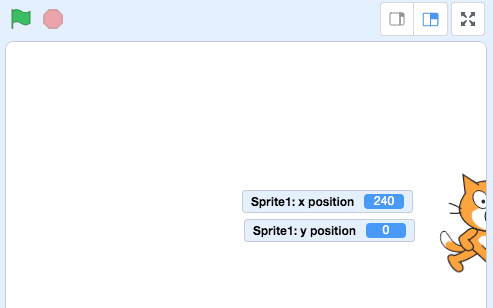
And this is what you see if the x position is 240!
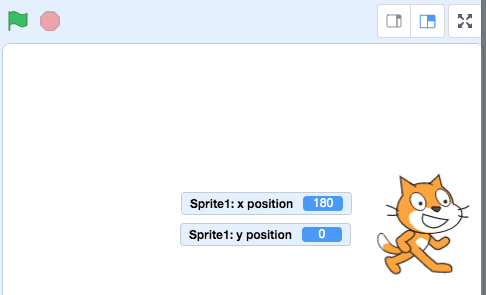
Set x near to 180. This will be as far to the right as we will let our sprite get. It will correspond to an object being directly in front of Marty's distance sensor.
It might all sound a bit mysterious just now but keep going! Your code so far should look like this:
POsitioning the sprite
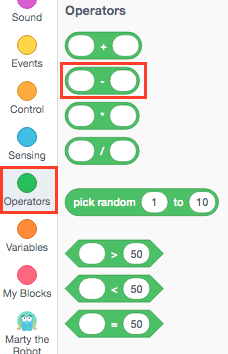
OK, let's do a quick bit of maths to find out where to position our sprite! For this, we need an operator.
We will be taking one value away from another value so need an operator block with a minus sign.
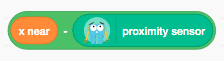
If the object is directly in front of Marty's distance sensor, then the proximity sensor reading would be 0 and we want our sprite to be on screen at the x position set by the value of x near.
If the object is moved away from Marty's distance sensor, the proximity sensor readings are bigger than zero. We want to move the sprite away from the right hand edge of the screen as the distance from the sensor increases. We can take away (minus) the value of the proximity sensor reading from the value of x near to get the x position of where we want our sprite to be shown on screen.
We can tell our sprite to go this position using a motion block:
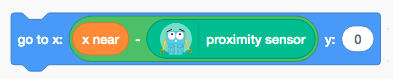
Hint: As our sprite is not moving up and down vertically, we are going to keep the all of the y positions as zero. If you have trouble remembering which way round x and y are, think y is up in the sky!
Adding Instructions
To help us park, we want the sprite to give us instructions. We are going to make these instructions appear as text on the screen.
We will use the say block from the looks section of our coding blocks. You need to make three say blocks.
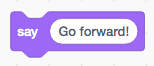
Make a say block to make the sprite say Go forward!
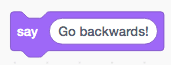
Make a second block to make the sprite say Go backwards!
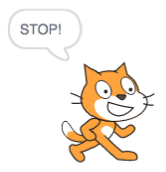
Make a third say block to make the sprite say STOP!
Hint: To keep it simple, we will have just three instructions because if you are busy trying to park you don't have time to read complicated instructions on screen!
Which way? control and operators
To control the position of the sprite on the screen, we will need to compare the proximity sensor reading to the parking distance.
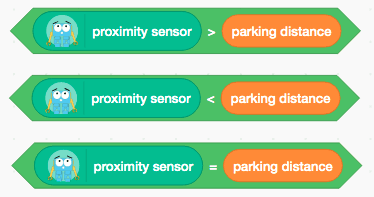
We are going to use the greater than, less than and equal to blocks from the Operators section of our coding blocks.
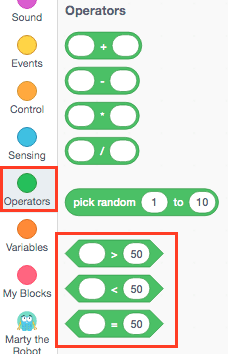
Make three blocks as shown below:
When the reading on the proximity sensor is greater than the parking distance, the object is too far away from Marty.
When the reading on the proximity sensor is less than the parking distance, the object is too close to Marty.
When the reading on the promimity sensor is equal to the parking distance, the object is at the correct distance from Marty and is perfectly parked!
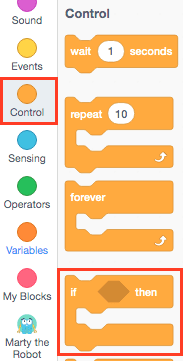
The next step is to use a if blocks from the Control section of our coding blocks to program what should happen if the object is too far, too close to or just the right distance from Marty. Inside each if block, we will put instructions to tell the sprite what to say and which x position to move to.
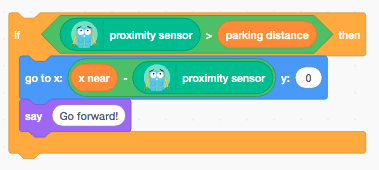
Make an if block for when the object is too far away from Marty.
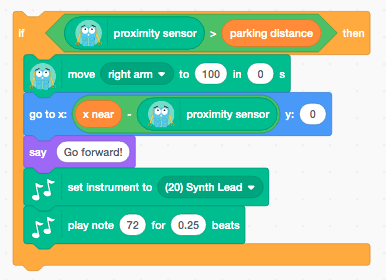
If the reading on the proximity sensor is greater than the parking distance, then we want the sprite to go to the x position set by the motion block and say Go forward!
Make a second if block for when the object is too far close to Marty.
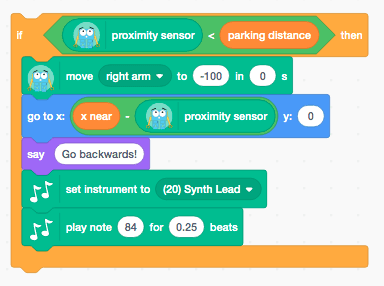
If the reading on the proximity sensor is less than the parking distance, then we want the sprite to go to the x position set by the motion block and say Go backwards!

Make a third if block for when the object is at the correct distance from Marty.
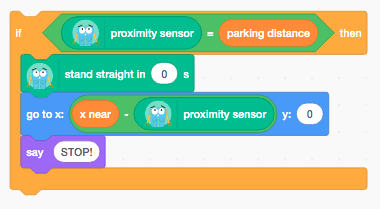
If the reading on the proximity sensor is equal to the parking distance, then we want the sprite to go to the x position set by the motion block and say STOP!

Use a forever block from the Control section of the coding blocks to keep the program looping (running) until you decide to stop it.
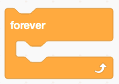
Put the three if blocks that you made inside the forever block and add it to your code:
Adding ARM Movements and ALARMS
Now it's time to add helpful Marty arm movements and sprite sounds!
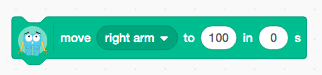
First, get the visual signals ready. You are going to program Marty's right arm to go up to warn you if your object gets too close and move Marty's right arm down if the object is too far away. If your object is perfectly parked, Marty will be programmed to stand straight.
Hint: You can experiment with movements! You could program Marty's eyes to move too!
Next, it is time to get the audio alarms ready.
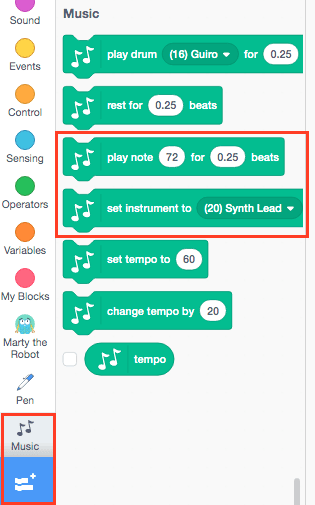
If the music blocks are not already showing then click on the blue add extension icon at the lower left of the screen as shown below to open the choose an extension screen. Click on Music to add the music and drum blocks. You are going to use the play note and set instrument blocks.
Now for perhaps the best bit! We need to make some very annoying alarm sounds! We are going to make two alarm sounds - one for forwards and the other for backwards.
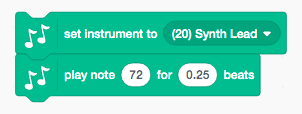
Set the instrument to synth lead.
You can change the pitch of the musical note by changing the number after play note. The numbers correspond to the notes on a piano keyboard with the "middle C" being number 60. The higher the number, the higher the note. Set play to 72 and to 84.
You change how long each note lasts for by changing the number before beats. Set the note to last for a 0.25 beats. This will give us a rapid beeping sound.
Hint: Play around with different instruments and notes. An good alarm sound is difficult to ignore!
Add the blocks that you have just made into the if loops that you made earlier:
Practise makes perfect - it's parking time!
Time to test your perfect parking system! We started our testing with a simple box and then toy vehicles and even tried parking a person.
Do NOT test the Marty parking system on a real car and STAY SAFE whatever you do!
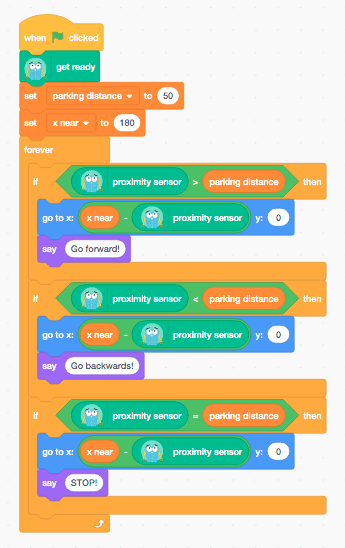
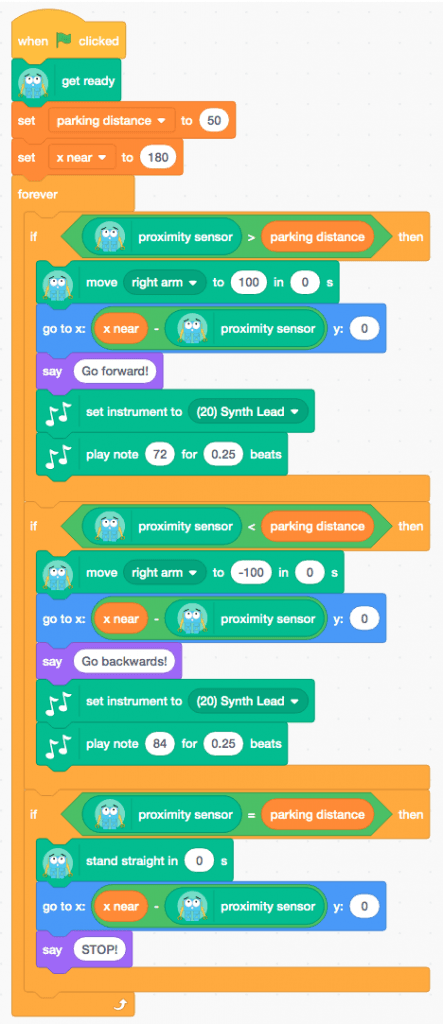
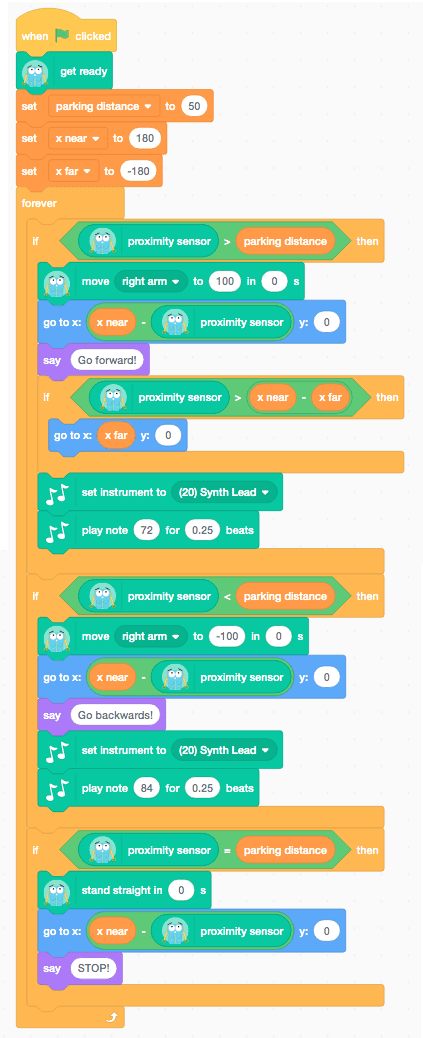
The complete code looks like this:
Challenge: Uh-Oh Lost Sprite! Can you Keep the sprite on the screen?
Have you noticed that if an object moves too far away from Marty's distance sensor, it might disappear off the left side of the screen? Can you add some code to keep the sprite on the screen until the object comes back into range?
Add another variable to set how far left you will let your sprite get on screen.
Work out the difference between your rightmost and leftmost x position values.
If the proximity sensor reading is more than this difference, your sprite will head off the screen. You want to move the sprite to an x position that keeps it visible on the screen instead! We don't want to lose our sprite...
Here are some things to think about:
- Look back at the defining the variables section of this activity to remind yourself of the range of values of x position.
- Define your new variable and give it a helpful name that you will remember.
- How will can you work out the difference between your rightmost and leftmost x positions? You will want to use an operator block! You need to subtract one value from the other.
- Write a loop of code to tell the sprite what to do if the proximity sensor reading is greater than this difference. You will want to use a control block with a motion block to position the sprite!
- Add this extra loop into your code. If you want Marty's arm movement and the alarm sound to continue until the object comes back into range, this new loop will need to go inside one of your existing if loops. This makes it a nested loop!
Answers!
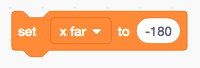
Define a new variable. We have called our variable x far. This is the x position as far to the left as we will let our sprite go on screen.
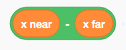
Find the difference in value between x near and x far using an operators block with a minus sign.
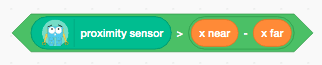
We want to control the sprite when the reading on the proximity sensor is greater than this difference so we used a greater than block from the operators section.
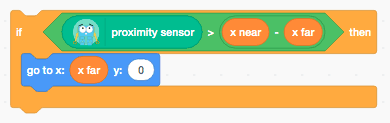
We made an if loop using this operator block and a motion block, to tell the sprite to go to x far (the leftmost position) if the proximity sensor reading was greater than the difference between x near and x far. It doesn't matter how much greater, the sprite is just told to go to the leftmost position if the difference is greater!
Then we put this if loop inside the if loop already in our code for when the proximity sensor reading was greater than the parking distance.
What Next?
You have now just created and programmed your own Marty's perfect parking assistant using Scratch and the distance sensor. If you want to continue to explore how to use distance sensor readings in your coding or how to continue to improve your parking system, here are a few ideas!
- At the moment, you can only park perfectly for one value of the proximity sensor. See if it is easier to park if you include more values in your perfect parking range. Try changing the way you use the greater than, less than and equal to operators in your code!
- Can you change the alarm sound? Try making it get gradually higher in pitch or loudness as you get closer to Marty!
- How would you like Marty to celebrate your perfect parking? At the moment, Marty just stands straight and the sprite says STOP! Try adding more movements and sounds!
- See you can can make the parking program pause or stop when you have parked perfectly! Look at the Control blocks section of our coding blocks for possibilities!
