
Marty's Super Speed Investigation
Introduction
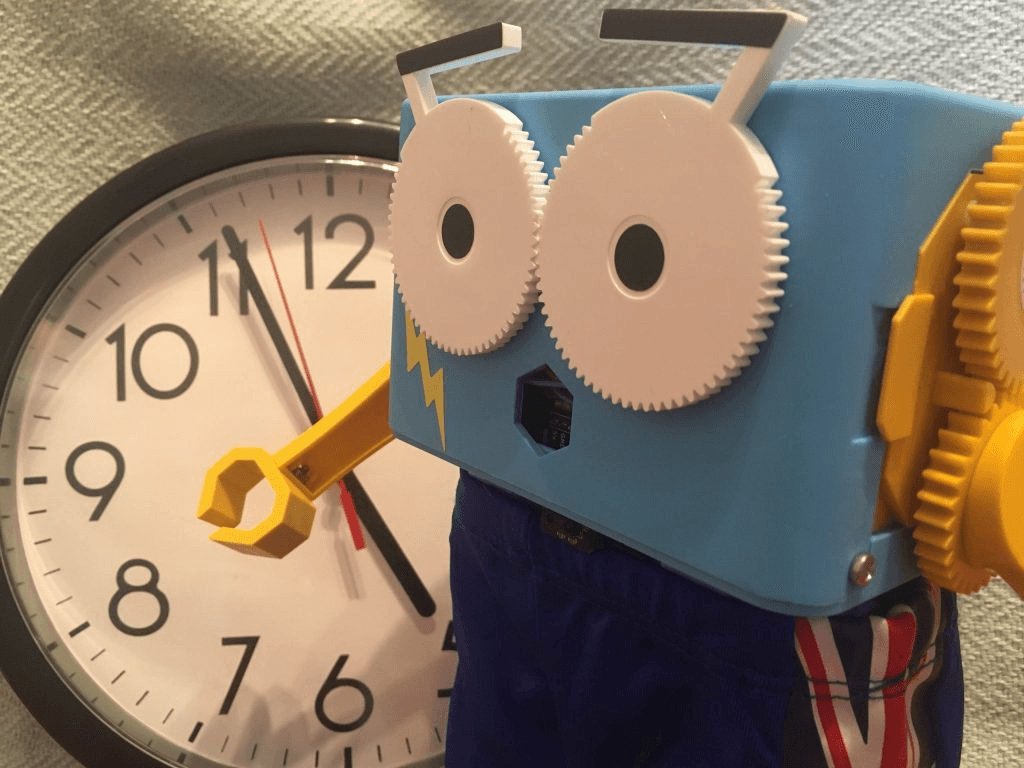
What is the fastest way for Marty to move? Walking forward? Sliding sideways? Using Scratch 3, you will code a countdown timer that starts and stops Marty moving. You can then change the way that Marty moves and see how far Marty goes! If you want to take this further, you can measure the distance Marty has travelled and work out Marty’s speed.
what you will need
- A Scratch 3 compatible device
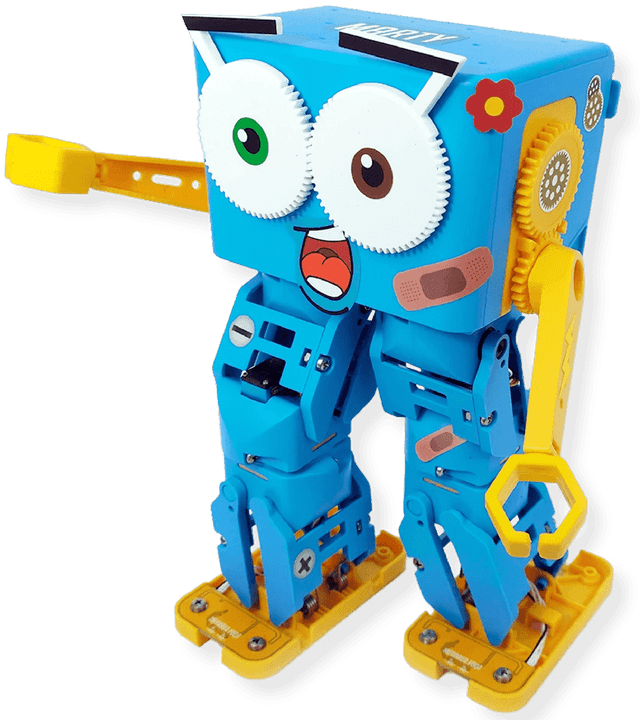
- Marty the Robot
- A metre stick, ruler or tape measure
- Masking tape or equivalent to mark a start line
What will you learn about?
- How to calculate speed from distance and time measurements
- How to use looks and sensing blocks
- How to use parallel programming
- How to use event, control and operator blocks
extra information for educators
This activity can be linked to concepts covered in the lesson packs Programming Concepts 1 and Programming Concepts 2
As this activity uses concepts from Physics often investigated when studying forces and motion, the activity also partially addresses benchmarks in the following curriculum areas:
- Curriculum for Excellence (Sciences)
- National Curriculum (Science)
- F-10 Curriculum (Science)
Coding a countdown timer
We are going to start by making a simple countdown timer that ticks down in seconds.
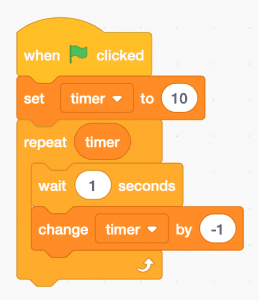
Create a new Scratch 3 project with the Marty the Robot extension added.
Getting Started with Scratch 3
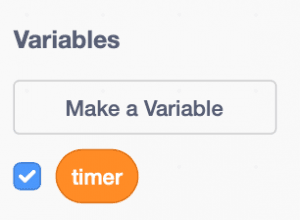
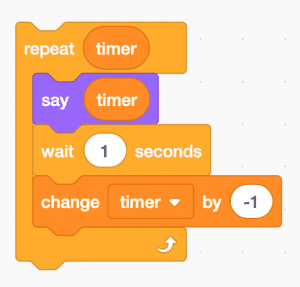
We want to code a timer that counts down by a set number of seconds. To do this we want to make a variable. This variable is for the total number of seconds that our timer is set for. To make a new variable, select the Variable option in the code blocks drawer followed by the Make a Variable button. You will be asked what you want to call your variable, we called our variable timer.
Set the timer to 10 seconds using the set variable block from the Variables option in the code blocks drawer.
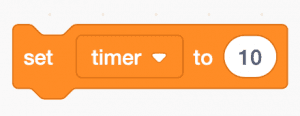
Hint: You can change how long your timer runs for by setting timer to a different value!
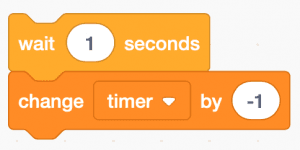
To count down, we want to wait for one second then reduce the value of the time variable by one.
To do this we want to use the gap variable block from the Control option in the code blocks drawer.
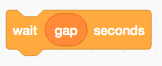
Set the gap variable to 1 second. Then we want to add a change variable block from the Variables option in the code blocks drawer and set it to -1.
Because we want our timer to count all the way down to zero, we want to repeat this step until the timer reaches zero. To do this easily, we can make use of a repeat block from the same code blocks drawer. This is also known as making a loop. Set the repeat to the initial value of the timer.
Place the wait and change blocks inside the loop.
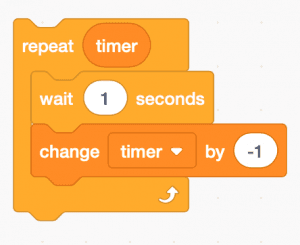
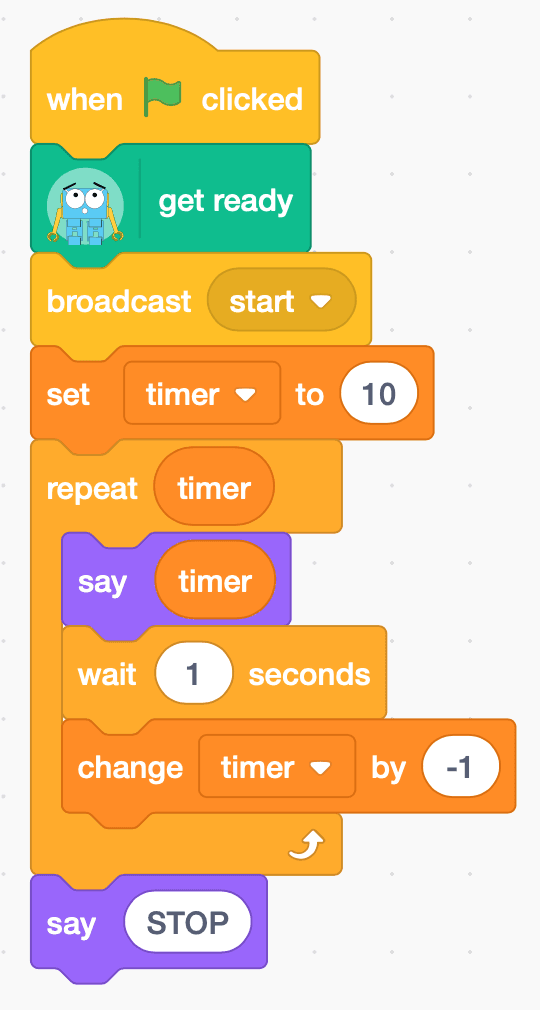
Our complete code so far looks like this:
Adding a sprite to tell you the time
It would be helpful to have a sprite on the screen tell us the time on our countdown timer.
We want to add a say block from the Looks option in the code blocks drawer. Put the say block inside the loop code that we have just created and set it to say the value timer.
Remember to tell Marty to get ready.

When the timer reaches zero, we want the sprite to say STOP. Make another say block for this:
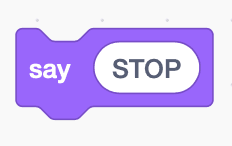
Add the say STOP block after the loop so the complete code for our countdown timer with helpful sprite is now:

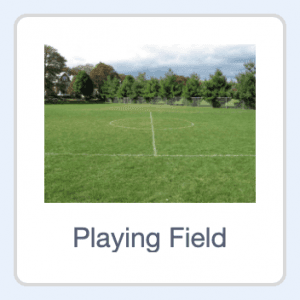
We also added a backdrop to inspire us! On the right hand side of the Scratch screen, there is the Stage with Scratch cat currently loaded onto it. We want to change the background that Scratch cat is currently on by hovering on the blue circle with an image logo that can be found in the bottom right of the screen. Then find the option that says Choose a Backdrop.
We selected the Playing Field background.:
To make the Scratch cat look as if it is running, we changed its Costume. At the top left hand side of the Scratch screen above the code blocks, select the tab named Costume.
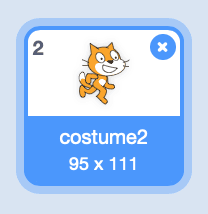
On the Costume screen, select costume2.
Making marty move while the countdown timer ticks down...
We want Marty to start to move when the timer starts and stop moving when the timer reaches zero. This means we want two things to be happening at the same time so will use parallel programming.
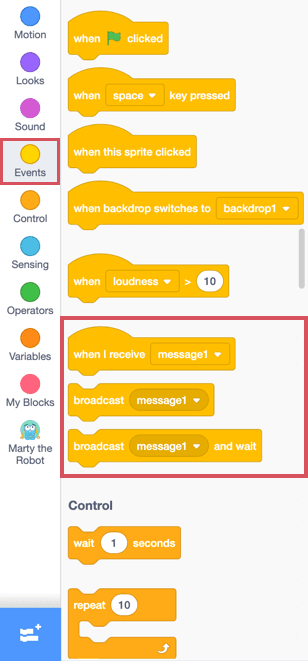
We will use a broadcast block from the Event blocks. This block sends a broadcast message across our Scratch program and any code that starts with the when I receive block set to that particular broadcast message will be kick-started to run. These blocks are shown below:
So we need two different actions to happen at the same time:
- Run the countdown timer
- Move Marty until the timer stops
To do this we need to run our coding blocks in parallel which means at the same time. Make a broadcast message called start.

Add the broadcast message to our existing code after get ready:
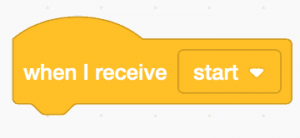
Just above where you found the broadcast block in the Events coding block drawer, you will see a when I receive message1 block. This block will run when we broadcast that message. Make a when I receive block set to start.
Now it is time to code Marty’s motion. Whatever Marty is doing whether it is walking forwards, sliding sideways or any other creative way to move, we only want Marty to be doing this while the time counts down.
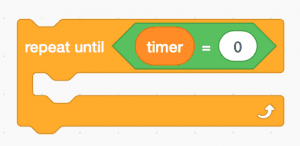
Start by coding a loop that will repeat until the time is equal to 0 (zero). For this we need a repeat until block from the Variables option in the coding block drawer.
We also need the block with the equals sign from the Operators option in the coding block drawer. This block checks if the first value is equal to the second value. If the values are equal, the loop will stop; otherwise it will repeat and then compare values again… Set this block to test if the value of the timer is equal to 0 (zero).
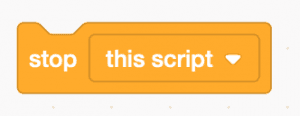
If the timer is at zero, we want this script to stop running to stop Marty from moving any further. Use a stop block from the Control blocks.
Put the stop block after the loop that we have just coded:
Then add the when I receive block to the start of the loop.
We can now add whatever motion we want Marty to do inside the loop.
Here is an example of the complete code that would make Marty walk forwards until the timer reaches zero. We only need to tell Marty to walk 1 step forwards as the repeat block makes one step happen again and again... and again until the timer stops.

Set up a start line for Marty and give the code that you have written so far a go!
Changing Marty's Motion
So we have a countdown timer, a helpful sprite and we have made Marty walk forwards until the timer stops. Now we can start playing with Marty's different movements and see what effect this has on how fast Marty moves.
We can change Marty's motion using these walk and slide blocks from the Marty the robot code drawer. Try changing the length of a step or slide or the time taken for these movements to happen. You might come up with other ways of making Marty move along using other code blocks!

Working out marty's speed
It can be useful to know the speed of a moving object. This is an idea you might come across in Physics or Maths lessons. It also gets used in all sorts of everyday situations from sports to speed cameras!
Here are a few things you will need to think about:
The speed of an object can be worked out if we know the distance travelled by the object in a certain time. If you measure the distance that Marty has moved from the start line when the timer reaches zero and you know the time that the timer counted down for then you have the information needed! You can work out speed by dividing the distance travelled by the time taken as shown by the relationship below:
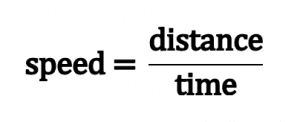
Remember to note what units you are using the measure the distance in so you give the correct units for your speed. For example, a distance measured in metres with a time measured in seconds will give a speed measured in metres per second; whereas a distance measured in centimetres with a time measured in seconds will give a speed measured in centimetres per second.
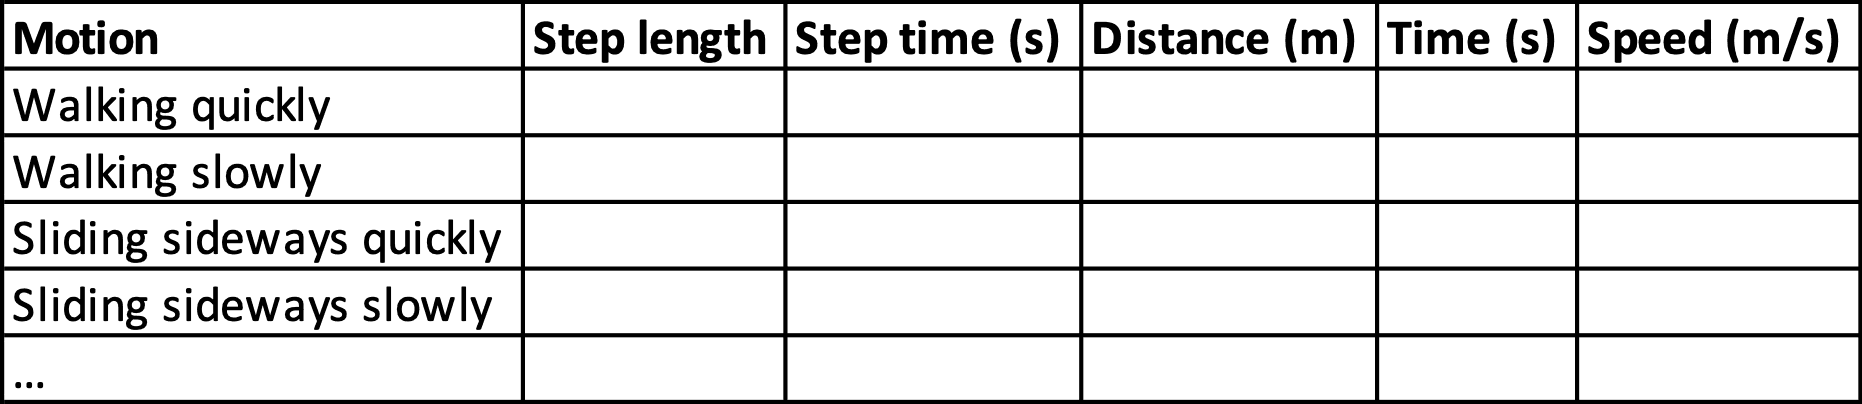
Make Marty move in different ways, record distance and time measurements and work out Marty’s speed!
You might find it helpful to draw up a results table like the one shown below:
Challenge: Coding the speed calculation
Now that you know how to work out speed, wouldn’t it be helpful if all you had to do was measure the distance travelled and then have the sprite calculate the speed for you?
Your challenge is to add blocks to the code so that, after Marty stops moving, the sprite on screen asks you for distance and time measurements and then displays the speed that Marty was travelling at.
Here are a few things you will need to think about:
- How will the sprite ask questions and how will you enter your answers? You will need Sensing blocks!
- The speed that is calculated needs to have the correct units. You will need to decide what units you want the distance and time answers entered in!
- How will your code keep track of the information that is entered? You will need Variables blocks!
- How will you calculate speed and display the answer with units? You will need Operators blocks!
ANSWERS!
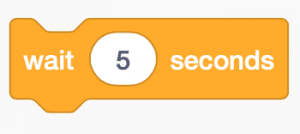
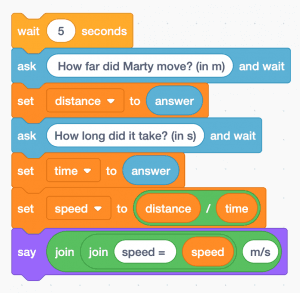
So that sprite’s STOP message stays visible for a while after Marty stops moving, use a gap variable block from the Control option in the code blocks drawer. We set our wait time to 5 seconds.
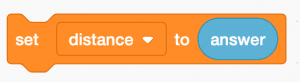
Next we used an ask and wait block from the Sensing option in the code blocks drawer. We asked the question "How far did Marty move?" and we added "(in m)" to remind the user to put their distance measurement into metres.

To store the answer, we made a new variable which we called distance. Use a set block to make distance be equal to the answer that has been entered as shown in the code below.
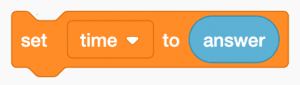
Use another ask and wait block for the question "How long did it take?" and we added "(in s)" to remind the user to keep their time measurement in seconds.

To store the answer, we made a new variable which we called time. Use a set block to make time be equal to the answer that has been entered as shown in the code below.
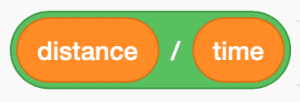
Next we need the Operator block that divides one quantity by another. We are going to use it to divide the value of the distance variable by the value of the time variable.
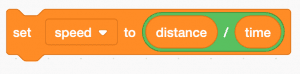
Set the value of the speed variable to be the distance divided by the time.
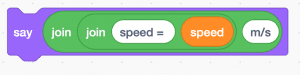
We want our sprite to tell us what the value of the speed is along with the units of speed. Use a join blocks from the Operators code drawer to put the text “speed = “ with the value of the speed variable.

Next use another join block to nest this text with the text for the units “m/s”.

Then we need to sprite to say the line of code that we have just written. It looks like a bit of a mouthful for our sprite but it will be a lot easier to understand when you see what appears on screen! Use a say block as shown below:
Putting it all together, the complete extra bit of code that goes after say STOP in the original code looks like this:
What Next?
You have written the code for a countdown timer then used parallel programming to control when Marty starts and stops moving. You have explored changing Marty’s motion and may even have successfully calculated Marty’s speed! If you want to keep investigating Marty’s super speedy motion, here are a few ideas…!
- Use your speed measurements to find out the fastest way for Marty to move, test this by racing with other Martys! Did you win?
- Investigate whether walking forwards or sliding sideways is the fastest way for Marty to move? Stay safe at any top speeds and make sure Marty is not going to fall!
- How much does the surface that Marty is moving on affect Marty’s speed? Test out the same movements but on different surfaces and compare how far Marty goes!
- Make Marty move with sound effects! How about a timer that beeps every second?