
Marty's winter wipeout
Introduction
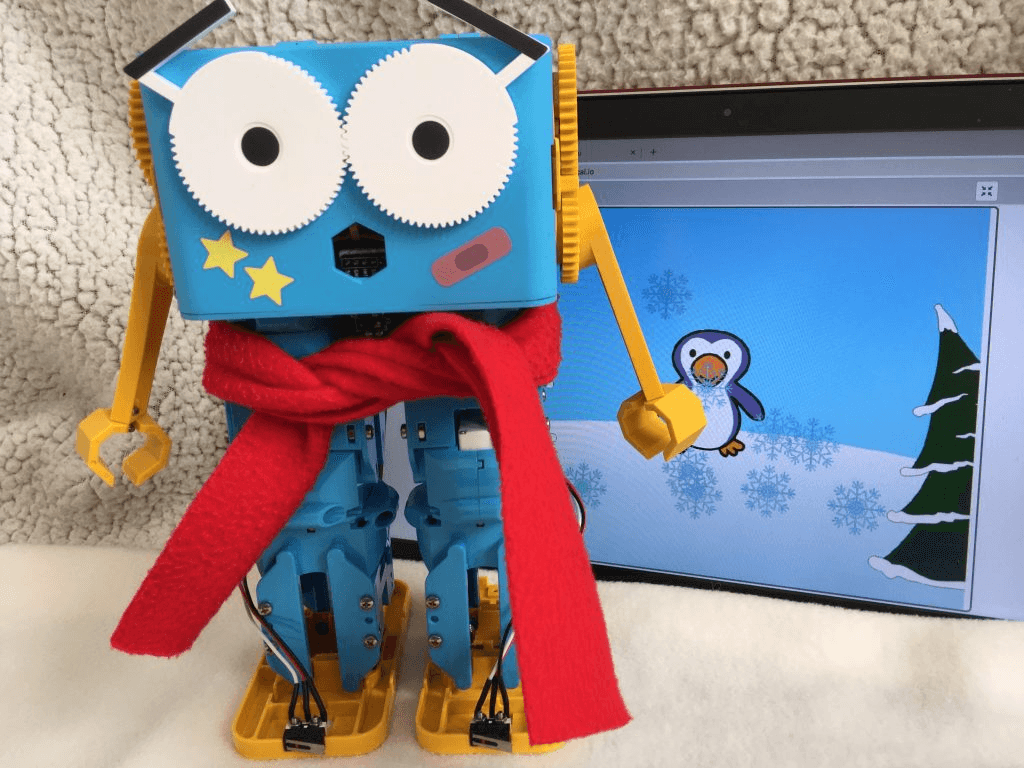
Using Scratch 3, you will code a snowstorm then create an interactive program using the input from two bump switches attached to Marty's feet to control a penguin sprite on screen making it move with sound effects. You will extend your code to make Marty move at the same time. You can then use this code as the basis for setting up your own Marty Winter Wipeout course so get your imagination ready!
After coding a snowstorm, the input from two bump switches attached to Marty's feet is used to control a penguin sprite on screen. The sprite moves with sound effects to the right, to the left or jumps depending on the inputs received. The code is extended to make Marty move at the same time as the sprite. Marty is then ready to take on a Winter Wipeout Challenge so get ready to use your imagination!
what you will need
- A Scratch 3 compatible device
- Marty the Robot
- Two bump switches
What will you learn about?
- How to use the input from bump switches to control a sprite on screen
- How to use event, control and operator blocks
- How to add sound and motion blocks
- How to use parallel programming
extra information for educators
This activity can be linked to concepts covered in the lesson packs Responding to our Environment and Programming Concepts 1 and 2.
Lesson Pack – Responding to Our Environment
Lesson Pack – Programming Concepts 1
Lesson Pack – Programming Concepts 2
Attaching and using the bump switches
You can find a helpful guide to bump switches in Bump Switches: Give Marty a Sense of Touch! This also gives you instructions for connecting bump switches to Marty. You will need two bump switches, one attached to each of Marty's feet.
Create a new Scratch 3 project with the Marty the Robot extension added.
Getting Started with Scratch 3
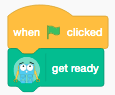
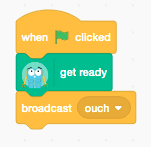
Time to get programming! Start with a when green flag clicked event block and then tell Marty to get ready.
When we connected the bump switches to Marty, the bump switch connected to Marty's right foot was connected to Input 0 so will be readable in Scratch on GPIO input 0 and the bump switch connected to Marty's left foot was connected to Input 1 so will be readable in Scratch on GPIO input 1. Your inputs might be different depending on how your bump switches are connected to Marty.
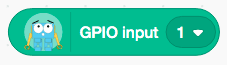
Towards the bottom of Marty’s scratch blocks, you’ll find an input block that looks like this:
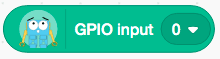
Click the block to check the current state of the bump switch. A “1” means the bump switch is pressed, and a “0” means it is unpressed.
Set the input to 1 to check on the state of the other bump switch:
We will use these inputs later in our coding.
Oh the weather outside... Create a snowy Scene
The first thing that we have to do is create an snowy theme on the Scratch stage section of the screen.
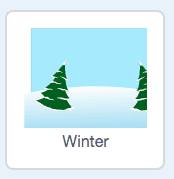
Change the backdrop of the stage to be something with a snowy theme.
How do I change the backdrop?
Let it snow...
Now we want to add a snowstorm! We are going to clone some snowflakes...sounds like fun!
We now need to select a new sprite - a snowflake to create a snowing effect. This is very similar to changing the backdrop except we use the button beside the backdrop one and search again like before.
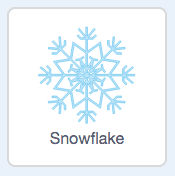
Change the size of your snowflake sprite by making the number in the Size textbox smaller. Our snowflake is set to size 25.
How do I add a new sprite?
Before we go any further, we want to make sure that the original cat sprite (Sprite1) isn't visible! We've heard of the expression "raining cats and dogs" but we don't want it to be literally "snowing cats and dogs"... To do this you need to change the setting for the sprite so that it isn't showing or you can delete it.
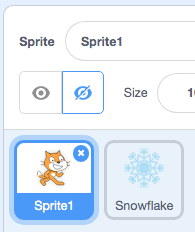
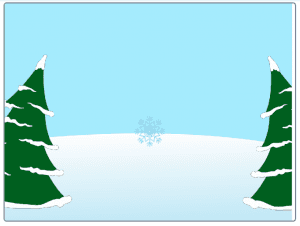
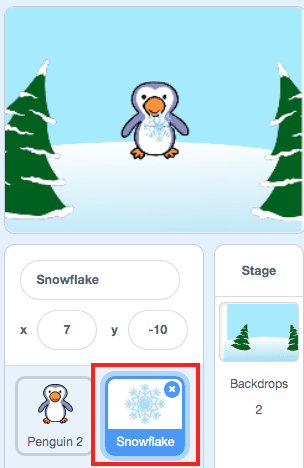
Once you have added your snowflake sprite your stage should look something like this:
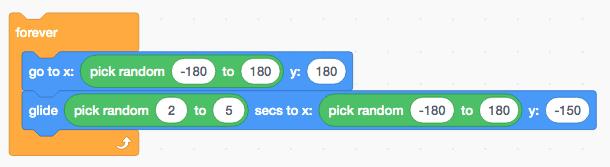
The screen is a 480 by 360 rectangle. The x position can be any value from -240 (sprite as far left as possible) to 240 (sprite as far right as possible). We are going to use x values from -180 to 180 to keep the snowflake on screen.
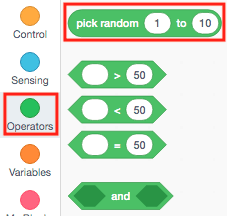
We will use a random block from the Operator blocks (shown below) to randomly pick the x value where the snowflake starts and another random block to select the x value of the finishing point of the snowflake.
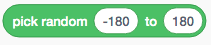
Set the values to range from -180 to 180:
Our snowflakes are going to fall from a y position of 180 at the very top of the screen to a y position of -150 near the bottom of the screen.
We can tell our sprite to go the start position using a motion block:

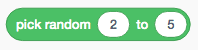
To make it more realistic, we will also vary the time it takes each snowflake to fall using another random block. Set this block to vary from 2 to 5.
We will add a glide block to move the snowflakes steadily to its finish position. We will use the second random block that we have just made to vary the time taken for the snowflake to fall from between 2 seconds to 5 seconds. We then need another random block just like the first one for final x position of between -180 to 180 with a final y position set to -150.

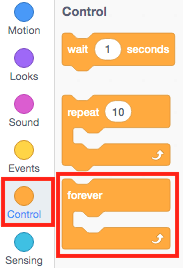
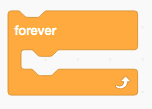
We want snow to keep falling so we will put these two code blocks inside a forever loop which can be found in the Control blocks section.
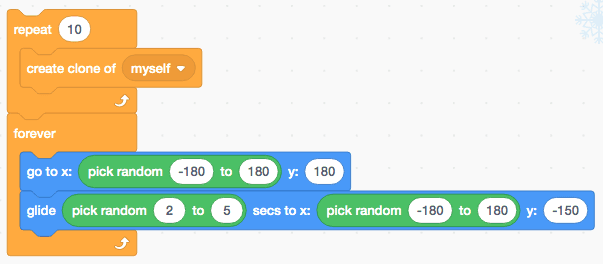
Our code now looks like this:
Just one snowflake makes for a very boring snowstorm, we need more!
We are going to clone more snowflakes. Cloning lets a sprite to make a copy of itself while the code is running. Every clone will run the same section of code but is independent of the other clones. This means that every one of our snowflakes will start and finish in a different random place on screen and take a different random time to fall.
The cloning blocks can be found in the Control blocks:
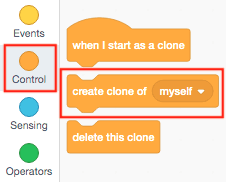
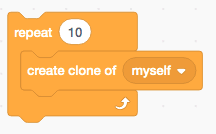
Start by making a clone of the snowflake sprite using the create clone block. Put this inside a repeat loop from the Control blocks.
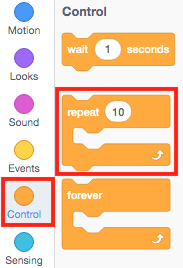
We have set the number of repeats to 10 to make 10 snowflake sprites.
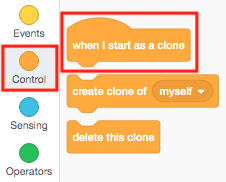
We now need to tell our newly cloned sprites what to do. Pick a when I start as clone block from the Control blocks.
Add the forever loop containing the snowflake code that you have made to make each clone independently run this code:
We also want the original snowflake sprite to move so add a copy of the forever loop containing the snowflake motion blocks to the code as shown below:
Hint: Play around with the snowflake settings to change your snowstorm! You can change the positions of the snowflakes, the time taken to fall and the number of snowflakes.
Picking the penguin
The next step is to add a penguin sprite on screen. This sprite will move in different ways depending on the bump switches pressed.
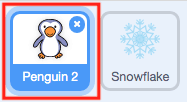
Add another new sprite - we picked a penguin! If you get stuck, look back at the "how do I add a new sprite" instructions.

Don't delete or hide the snowflake sprite!
If the bump switch on Marty's right foot is pressed, we want the penguin sprite to move away to the right as if it is avoiding an obstacle. We will get the code for the penguin "right" move ready and will link this with the Marty's right foot bump switch in the next section.
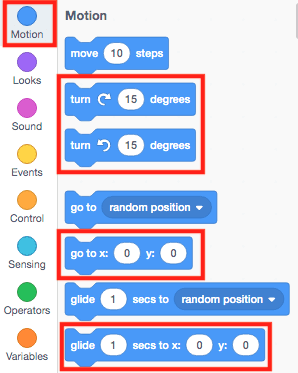
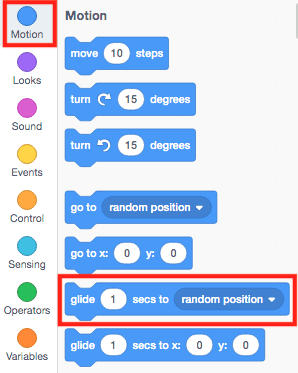
We are going to use turn, go to and glide motion blocks as shown below found under the Motion blocks:
We want the penguin sprite to start in the middle of the screen, select a go to block and set both the x position and y postion to 0.
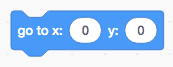
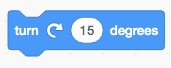
Next we will turn the penguin sprite slightly to the right using a turn block and setting the angle to 15 degrees.
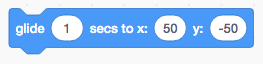
Then the penguin will move steadily down to the right on screen. For this we need a glide block and we will set the time to be 1 second, the x position to be 50 and the y position to be -50.
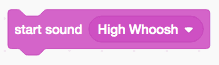
We want to add a sound effect so will use the start sound block from the Sound blocks.
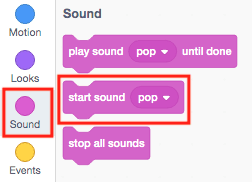
Choose the high whoosh sound effect.
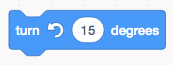
We then want to turn the penguin 15 degrees in the opposite direction using a turn block to make the penguin vertical again.
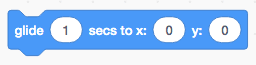
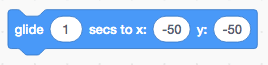
Then we want the penguin to move steadily back to the centre of the screen so use a glide block with the time set to 1 second and both the x position and y position set to 0.
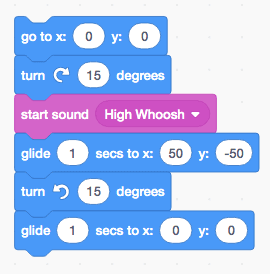
The complete penguin "right" move code looks like this:
If the bump switch on Marty's left foot is pressed, we want the penguin sprite to move away to the left as if it is avoiding an obstacle. We will get the code for the penguin "left" move ready and will link this with the Marty's left foot bump switch in the next section.
We are going to use turn, go to and glide motion blocks again to make the penguin sprite do the opposite moves to the code we have written for the right bump switch.
We want the penguin sprite to start in the middle of the screen, select a go to block and set both the x position and y postion to 0.
Next we will turn the penguin sprite slightly to the left using a turn block and setting the angle to 15 degrees.
Then the penguin will move steadily down to the left on screen. For this we need a glide block and we will set the time to be 1 second, the x position to be -50 and the y position to be -50.
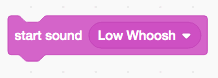
We want to add a sound effect so will use the start sound block from the Sound blocks. Choose the low whoosh sound effect.
We then want to turn the penguin 15 degrees in the opposite direction using a turn block to make the penguin vertical again.
Then we want the penguin to move steadily back to the centre of the screen so use a glide block with the time set to 1 second and both the x position and y position set to 0.
The complete penguin "left" move code looks like this:

If the bump switches on both of Marty's feet are pressed at the same time, we want the penguin to jump as if it is avoiding an obstacle. We will get the code for the penguin "jump" move ready and will link this with the both of Marty's bump switches in the next section.
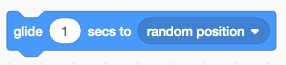
We are going to use the same motion blocks as before but will also use a different glide block from the Motion block shown below to send the penguin sprite to a random position!
We want the penguin sprite to start in the middle of the screen, select a go to block and set both the x position and y position to 0
Now to send the penguin sprite to a random position. For this we need the glide block shown above and we will set the time to be 1 second, the position to random position
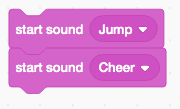
We want to add a couple of sound effects so will use the start sound blocks from the Sound blocks. Choose the jump sound effect followed by the cheer sound effect.
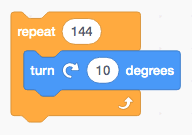
We want our penguin sprite jump to be spectacular so we are going to make our penguin rotate 4 times. A bit of Maths is useful here! There are 360 degrees in 1 complete turn. If the penguin sprite rotates 10 degrees at a time, we need 36 repeats for 1 turn...72 repeats for 2 turns...108 repeats for 3 turns...and 144 repeats for 4 turns! We need to put a turn block set to 10 degrees inside a repeat loop set to 144 repeats.
Then we want the penguin to move steadily back to the centre of the screen so use a glide block with the time set to 1 second and both the x position and y position set to 0.
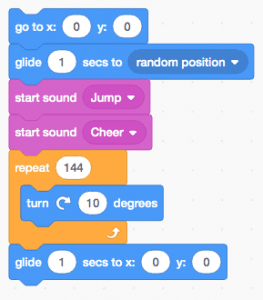
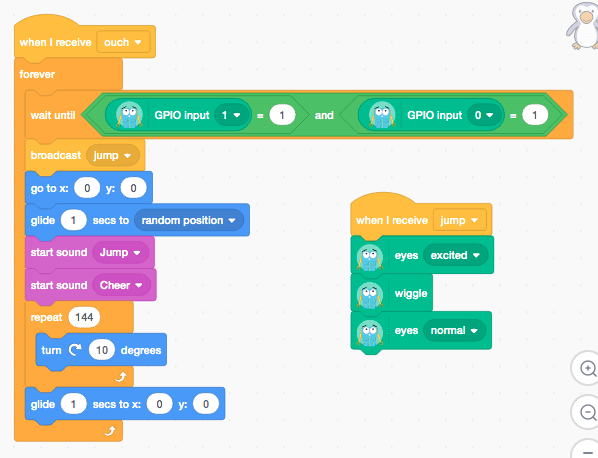
The complete penguin "jump" move code looks like this:
Control the penguin with the bump switches
Now we need to link the penguin sprite moves with the bump switches. We need to use a broadcast message for this.
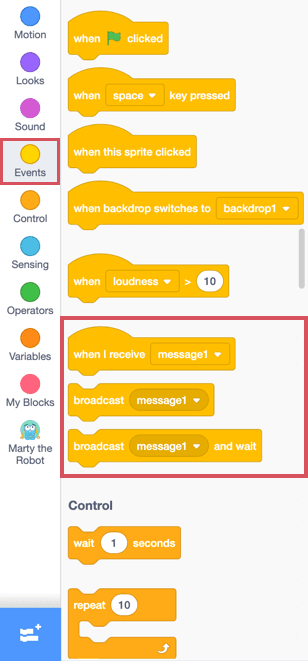
We will use the broadcast block from the Event blocks. This block sends a broadcast across our Scratch program and any code that starts with the when I receive block set to that particular broadcast message will be kick-started to run. These blocks are shown below:
We have called the message that is going to be broadcast when the bump switches on Marty's feet are pressed "ouch" because bumping into a obstacle sounds painful! Add a broadcast block to the get ready block and make a New message called ouch.
Next we need to write the code that receives the broadcast message. Start with a when I receive block and set it to receive the ouch message.

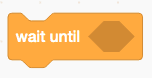
We only want the code to run when Marty's bump switches are pressed so we will need to wait for this to happen. We need 3 wait until blocks from the Control blocks as we have three possibilities that we will be waiting for:
- Marty's right foot bump switch to be pressed
- Marty's left foot bump switch to be pressed
- Both of Marty's bump switches to be pressed at the same time.
Remember the GPIO input blocks we looked at when we first started this activity? If you have forgotten, now is a good time to scroll back and remind yourself how the inputs from the switches work...
Ready now? OK, we want code to run when the switches are pressed and the input is 1. We will need to use an equals block from the Operator blocks.
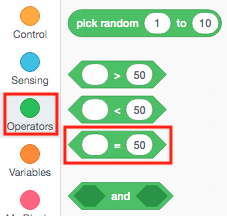
We want to wait until the switch is pressed before running the code that controls the penguin sprite. When the switch is pressed the input will be equal to 1 so put an equals block inside a wait until block and set the GPIO input for each of Marty's feet to be equal to 1.
Here is the code for Marty's right foot:

And here is the code for Marty's left foot:

It is a bit more complicated when both switches are pressed at the same time. We need an and block from the Operators blocks as shown below:
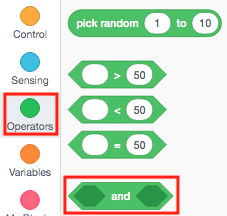
Put the and block inside the wait until block and set the inputs for Marty's left foot and Marty's right foot to be equal to 1.

We want our code to keep running ready for bump switches to be pressed at any time until we stop it so we will put the wait until blocks and penguin sprite code written earlier for the Marty's right foot, left foot and both feet inside forever loops.
Finally, we can finish this section by adding the when I receive blocks to the top of each section of code!
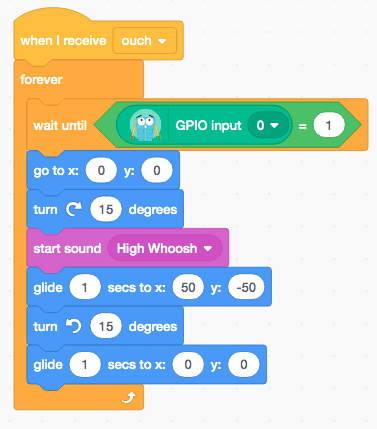
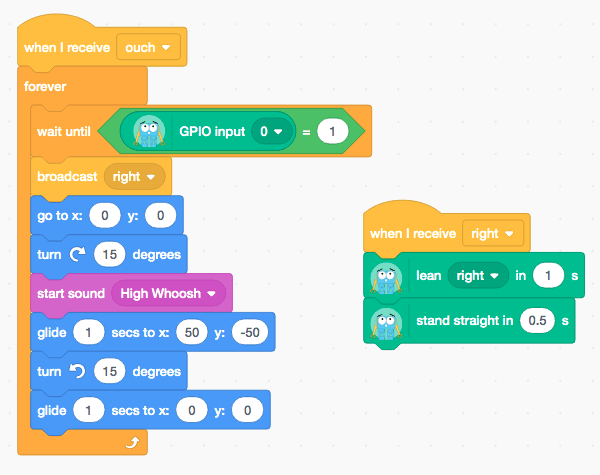
The complete code that will run when the ouch message is received and the bump switch on Marty's right foot is pressed looks like this:
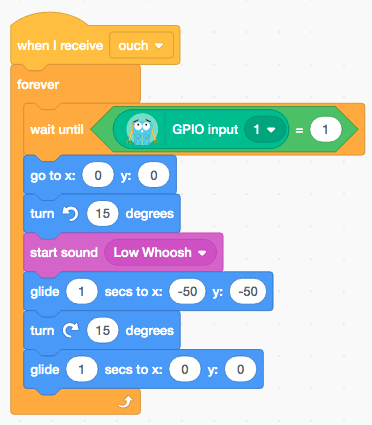
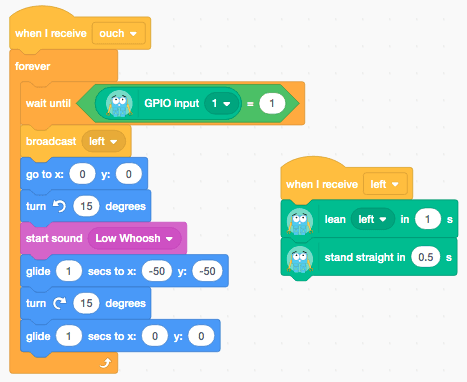
The complete code that will run when the ouch message is received and the bump switch on Marty's left foot is pressed looks like this:
Setting it all going
Ready for action? Time to set the program running...
First set the snowstorm going. Click on the snowflake sprite icon as shown to go to the snowflake code.
Click on the snowflake sprite icon as shown to go to the snowflake code.Click on the repeat block of code shown and snow should start falling.
Then click on the penguin sprite icon as shown to go to the penguin sprite code.
Click to start the penguin sprite code.
Test your code by pressing the bump switches to make the penguin move on screen!
Challenge: adding moves to marty
Now that we have the input from bump switches attached to Marty controlling a penguin sprite on screen, it would be fun to make Marty do some moves at the same time too!
Here are a few things you will need to think about,
- How are you going to have Marty and the penguin sprite move at the same time? You will need more broadcast blocks!
- How many different messages will you need to broadcast? There are 3 different ways that the penguin sprite has been coded to move!
- What moves will Marty make? Marty could do similar moves to the penguin sprite!
answers
To start off with, we will need to know when to start both the penguin sprite and Marty movements at the same time. Just like when we sent the ouch message when the bump switches are pressed, this can be done using broadcasting, where we broadcast or send a message across our Scratch program which can kick-start another set of blocks to run.
The broadcast blocks can be found under the Events section of our coding blocks. Then we just need to run the two different actions! To do this we need to run our coding blocks in parallel - which means at the same time.
Just above where you found the broadcast block in the Events coding block drawer, you will see a when I receive message1 block. This block will run when we broadcast the message. We need 3 of them because we are going to broadcast 3 messages right, left and jump to go with the code for the moves that the penguin makes when the right, left and both bump switches are pressed.
Let's make some moves for Marty.
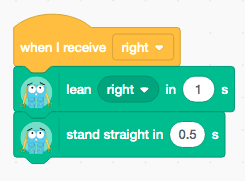
Use blocks from the Marty code blocks, to make Marty lean to the right then stand straight again when it receives the message right.
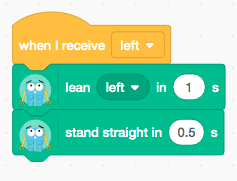
Then use the more of the same blocks to make Marty lean to the left then stand straight again when it receives the message left.
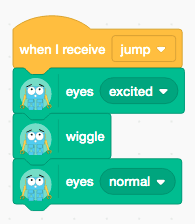
As we can't make Marty jump, we have gone for some eye movements and a wiggle! Use the eyes and wiggle blocks from the Marty code blocks.
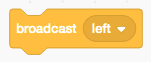
The last step is to insert the broadcast blocks into each section of the penguin sprite code.
You need to insert broadcast right into the code that goes with the bump switch on Marty's right foot being pressed:
You need to insert broadcast left into the code that goes with the bump switch on Marty's left foot being pressed:
You need to insert broadcast jump into the code that goes with the bump switches on both of Marty's feet being pressed:
What Next?
You have now just created and programmed a snowstorm and used the input from bump switches to control a penguin sprite on screen with Marty using Scratch. Marty is now ready to take on a Winter Wipeout! If you want to extend this activity, here are a few ideas:
- Make Marty move through an obstacle course of your own design. Think about positioning objects to hit Marty's right foot, left foot and both feet together!
- If Marty doesn't want to move, design a challenge where objects move towards Marty's feet to hit the bump switches. You might want to position Marty slightly higher than the surface so that the switches get pressed!
- You might want Marty to make sounds too. Explore Marty's play sound block!