

Marty with Scratch & The Micro:Bit
We used Scratch 3 to program a micro:bit to be a Marty remote control!
The program to do that is online here, so you can download it and try it out yourself. Read on to discover some more simple tips and tricks, and an explanation of what the code does...
Tilting the micro:bit steers Martys around, while the buttons can be used to make him kick and wiggle. We can also use the LEDs on the micro:bit to show things, like the battery level on Marty!
This is a fun project in Scratch 3, and makes use of a Bluetooth connection to the micro:bit, so you don't need to have the micro:bit connected to your computer!
Getting started is really straightforward, but we'll also take things a bit further to show off how some snazzy programming can make a smarter remote control!
Set Up
First off, you'll need a micro:bit, a Marty, and the Scratch 3 beta with Marty Extension at scratch3beta.robotical.io
- Follow the brilliant instructions at https://scratch.mit.edu/microbit to install Scratch link and set up your micro:bit to be ready for Scratch
- Power up the micro:bit and your Marty, in the normal way
- Load Scratch 3 and load the Marty and micro:bit extensions, like shown in this video:
Reacting to button pushes
Ok! Let's start super simple, and get our Marty, micro:bit, and Scratch 3 working in perfect harmony. Look in the micro:bit blocks section and the Marty section to find these blocks, and connect them together:
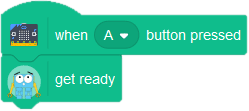
Now, when you press the A button on the micro:bit, Marty will get ready and wiggle his eyebrows! Cool!
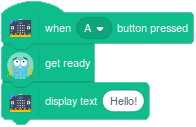
As well as using the micro:bit as input, we can also use the LED screen on the microbit. Adding an extra block we can say Hello too!
Making a simple remote control
As well as knowing when the buttons are pushed on the micro:bit, we can use the tilt sensing to steer Marty around! A simple remote control might look like this:
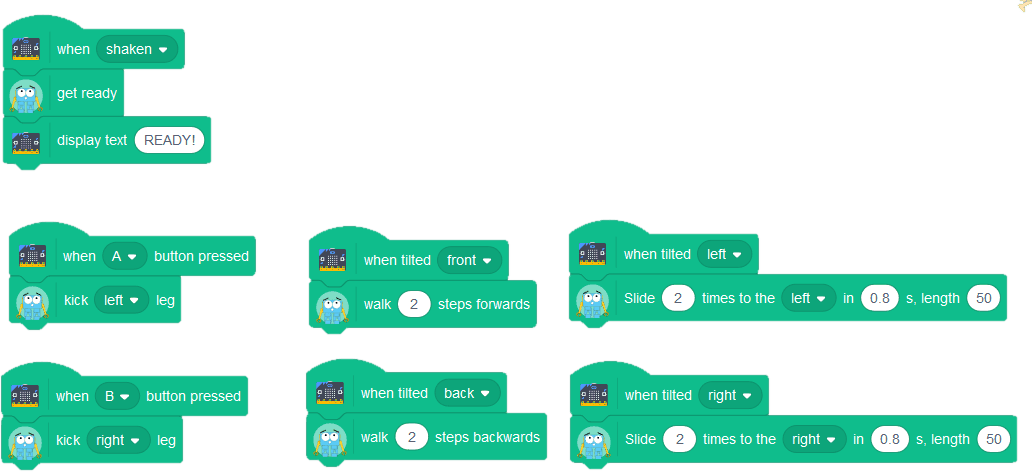
We want to use the A and B buttons to kick the left and right legs, so we need to find another way to get Marty ready. Here I've used the "when shaken" block to make Marty wake up and get ready when the micro:bit is shaken!
Tilting the micro:bit forwards or backwards will make Marty walk forwards or backwards a couple of steps. Tilting left or right will product sidesteps.
It might be nice to get some more feedback from the program, so let's get it to tell us what Marty is doing:
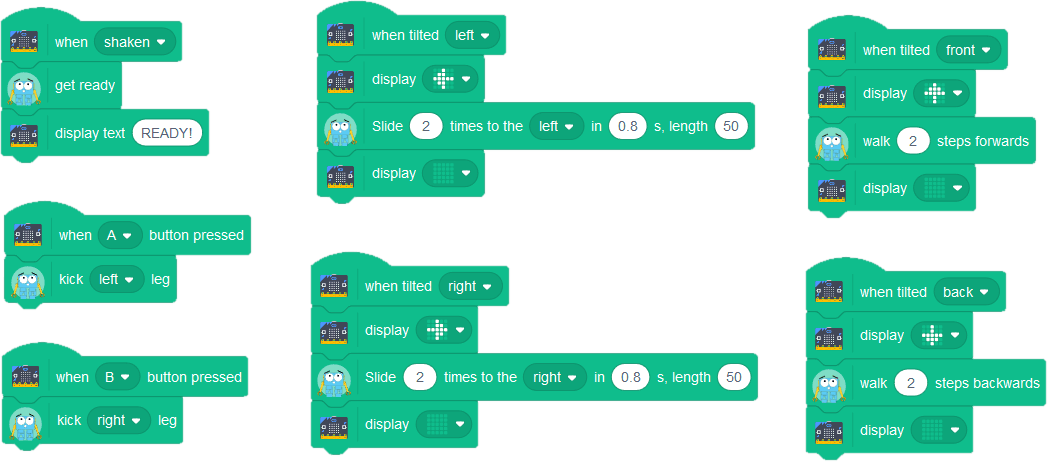
This uses the Scratch 3 block to display a pattern to the screen on the micro:bit. We've drawn arrows here, but you could use whatever you want!
An easier to use remote control
That program will definitely work, but what happens if you tilt the micro:bit diagonally? Marty might take a couple of steps forwards, then sidestep, or the other way around maybe... it's hard to know exactly what will happen, as the micro:bit is tilted both front-ward and left at the same time.
To make this easier to use, we're going to make it so Marty will walk and turn at the same time, turning more or walking further as you tilt the micro:bit more
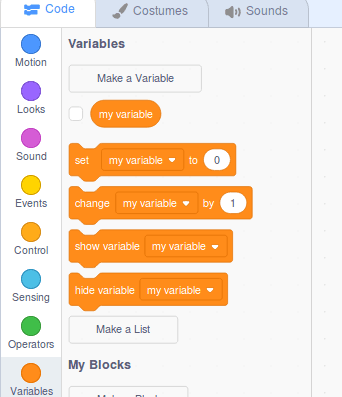
We're going to use a single "When titled" event for this, and a couple of variables! You can make a variable using the "Make a variable" button inside the variable blocks:
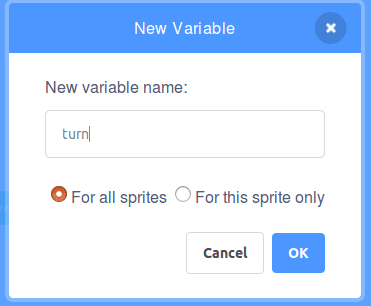
We want to make two variables, one called turn and one called length
We'll look at how the micro:bit is being tilted, set the turn and length variables to match the turning and step length we'd like Marty to do, and then put those into a walk command
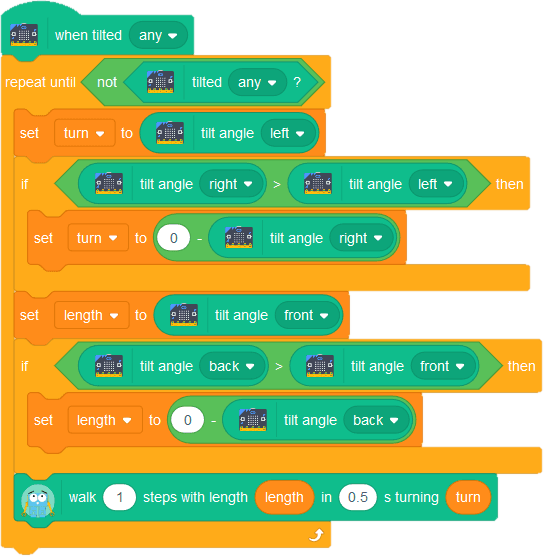
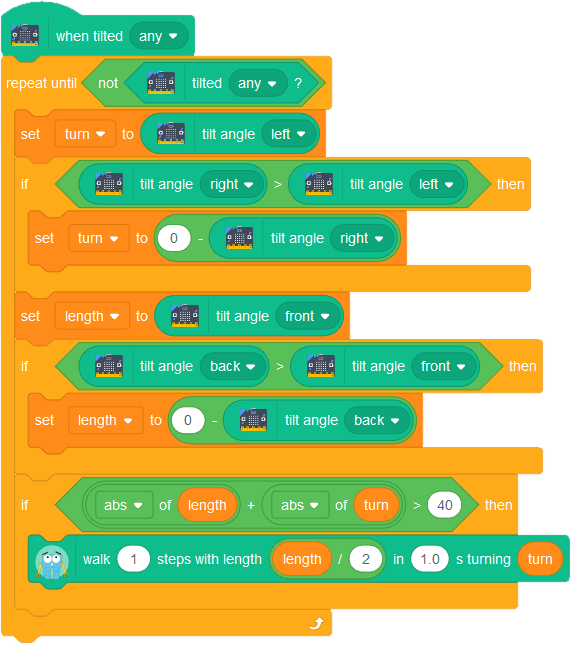
So, what's happening here?
- When the micro:bit is tiled, we're going to repeat this code until it's not tilted any more. This means if we keep the micro:bit tilted, Marty will keep on walking
- We start by assuming the micro:bit is tilted more left than right, and set the variable `turn` to the amount of left tilt, which is a number from 0-100.
- Next we check to see if that assumption was correct. If we were wrong, and the micro:bit is tilted more right than left, we change `turn` to use the right tilt instead. We need to say `0-tilt angle` since the Marty block will expect a turn value from -100 -> +100 (well, actually -128 -> +127)
- We do the same thing with front and back tilt, so `length` ends up set to show how far forwards or backwards we should walk
- We tell Marty to walk one step with the `length` and `turn` we just defined!
Making it less sensitive
If you've tried the code above out, you'll see that you have to hold the micro:bit really really flat to stop it sending walk commands to Marty.
It would be better if we only sent a command if Marty actually had a reasonable size step to take:

This code is very similar to before, except we added in an if abs of (length + turn) > 40 then instruction, and we only walk if the combination of length and turn variables passes a threshold. So that could be a turn of 40 or more, a length of 40 or more, or a turn of 20 combined with a length of 20.
The abs block there is used to make the sum of length and turn always a positive number. abs stands for absolute, and refers to the magnitude of a number, rather than whether it is positive or negative. so abs(40) would be 40, and abs(-40), would also be 40! We need to do this so that when we compare >40, or greater than 40, it will allow numbers 'bigger' than 40, whether they're positive or negative.
You can change the 40 in the code to make the controller more or less sensitive!
I also thought the step length was pretty large, so I divided it by two to give Marty a bit of a break!
I made a mistake
Oops.
I didn't actually spot this until I was filming the video above and I wondered why Marty wouldn't walk diagonally forwards in one direction.
But that's why testing is important, and we all learn by making mistakes!
See that abs of length + turn bit above, which is supposed to give a number that gets bigger as length and/or turn gets bigger? Well, if one is positive, and one is negative, they'll cancel each other our when we add them, and length + turn will give a small number...
Silly me. I should have done abs(length) + abs(turn) to make sure the numbers were each positive before I summed them. Like this:
Ok, with that fixed though, the tilt control works well!
Making the buttons do more!
We can use the buttons to kick, but it would be cool if we could make Marty wiggle if we pressed them both at the same time, to celebrate scoring a goal after kicking a ball maybe!
Unfortunately, there isn't a 'when both buttons pressed' block for the micro:bit in Scratch 3 yet. So we'll have to make one!
Rather than having separate when A button pressed and when B button pressed sections, we'll have just one section that deals will all button pressing!
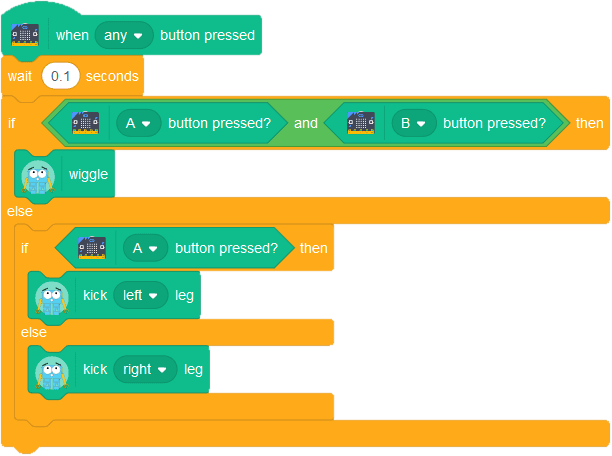
So, what does that do?
- We wait for 0.1 seconds. That's because even if you try really hard, you probably won't press both buttons the exact same instant. This gives a bit more time to see if both buttons have been pushed before deciding what to do
- Now we check to see if both buttons are pushed, using an `and` block, and if they are, we wiggle!
- If both buttons weren't pushed, we check if the A button was pushed, and if it was we kick the left leg
- If it wasn't, then the B button must have been pushed, and we'll kick the right leg instead
Getting the battery charge
In a long session of Marty football, it would be great to know how much battery your Marty has, and we can use the micro:bit to show that!

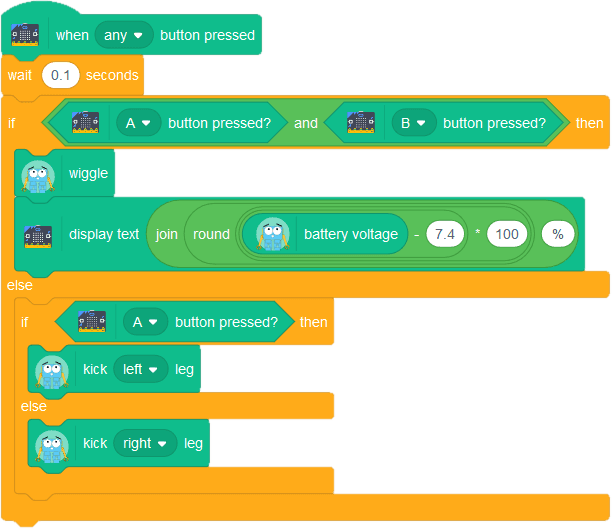
We use the battery voltage Marty block to get Marty's battery voltage. (Pro-tip, this block will sometimes return 'null' - we're working on fixing it! - but to keep it active click the checkbox next to it in the Marty blocks panel, that'll also display it in Scratch!)
A fully charged battery voltage is 8.4v, and the low battery is 7.4v, so there's a range of about 1.0v that we'll make into a percentage! We subtract 7.4 from the battery voltage and multiply the result by 100. So 7.9v would become (7.9-7.4)*100 = 0.5 * 100 = 50
Then we use the join block to join a '%' to the end of it when we display it.
I put that collection of blocks into the button section, so when you push both buttons at the same time Marty will wiggle, and then the micro:bit will display the battery charge percentage
The whole program
Ok, that's the whole program as shown off in the video at the top, altogether it looks like this:
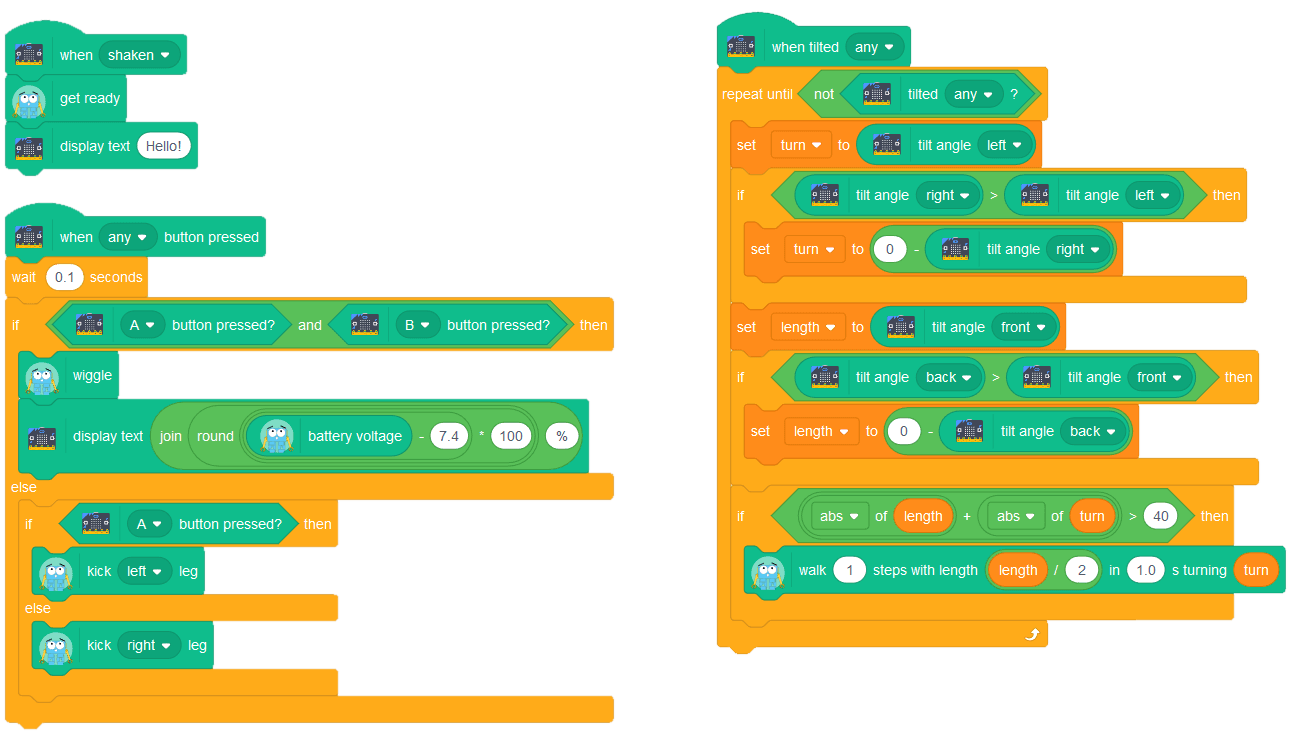
I also uploaded the program here, so you can download it and try it out yourself!