
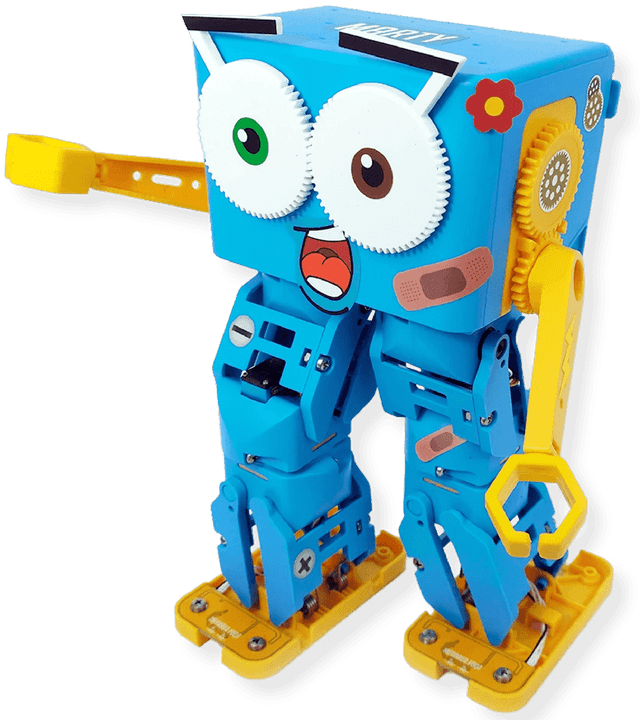

Shaking hands with Marty
Introduction
Using Scratch 3, you will create an interactive program when you get to shake hands with Marty, extending it to create your very own secret handshake with a robot.
To start off the handshake, Marty will raise an arm. You will then need to push down gently on the arm so that Marty can register the force on that arm and respond by shaking the arm and completing the handshake with a small wiggle!
What you will need
- with Wifi - a laptop or tabletA Scratch 3 compatible device with Wifi - a laptop or tablet
- Marty the Robot
What will you learn about?
- How to move individual body joints
- How to detect force on individual body joints using force sensors
Wxtra information for educators
This tutorial walks students through how to move Marty's body joints and explores force sensors. It also uses parallel programming and variables.
offering a handshake
The first stage of most handshakes involves putting out your hand to offer the handshake to someone else. Our program with Marty should be no different.
Create a new Scratch 3 project with the Marty the Robot extension added.
Getting Started with Scratch 3
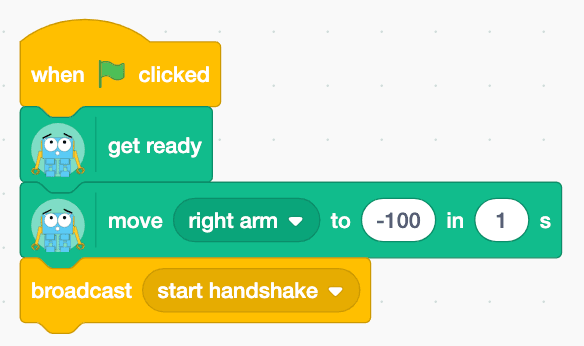
Program Marty to get ready and lift the right arm.

With the arm and hand raised, the next step is to shake hands - by programming the arm to move up and down multiple times. To do this easily, we can make use of repeat blocks, also known as loops, to repeat the up and down motion of the handshake. As the final step, we should return the hand to Marty's side since the handshake is finished!
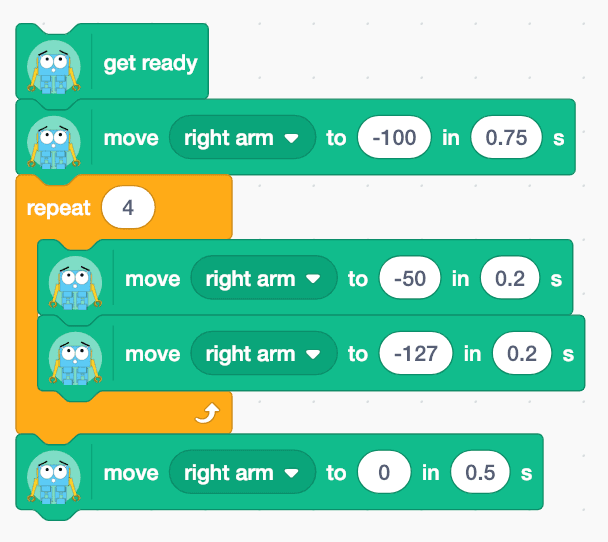
Hint: Change the number of times our program repeats the up and down movements to make the handshake longer or shorter!
adding some emotion
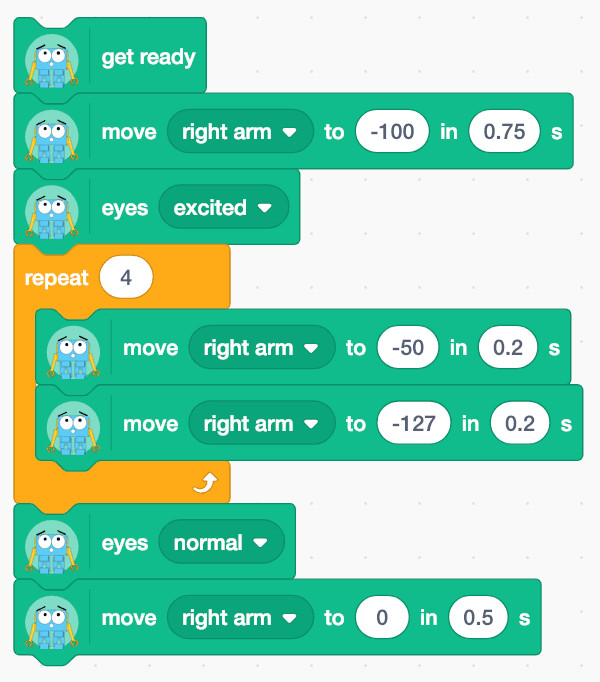
Now that we have a basic handshake happening, lets try and add some emotions into the movements to make our handshake look a lot more lifelike!
One way to add emotion into our movements is through using Marty's eyebrows! We can move the eyes to show a number of different emotions. Using the eyes block, when we click on the dropdown arrow then we get a list of options.
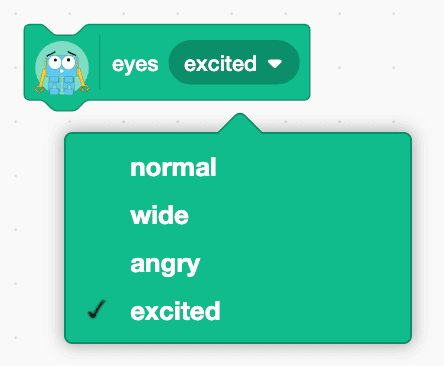
Hint: Try out the different ways you can program Marty's eyes
Try adding in some different eye movements during the handshake. Here is an example,
Hint: Stand up and give the person sitting beside you a handshake. Did you smile at them? When?
Challenge: moving marty's eyebrows in time with the handshake
We've already added some emotion into our sequence of movements that make up our handshake. However, can you make it even more exciting and move Marty's eyebrows each time the arm moves up and down?
Add some extra emotion blocks into our routine so that Marty's eyebrows move each time the arm moves up and down. Here are a few things you will need to think about,
- How can you make two blocks of code run at the same time? You'll need to use parallel programming for this!
- The timing of each movement so that your eye movements are in time with the arm movements
- You might want to broadcast a message to know when to start the eye movements
I need some help!
To start off with, we will need to know when to start both the eye and arm movements at the same time. This can be done using broadcasting, where we broadcast or send a message across our Scratch program which can kick-start another set of blocks to run.
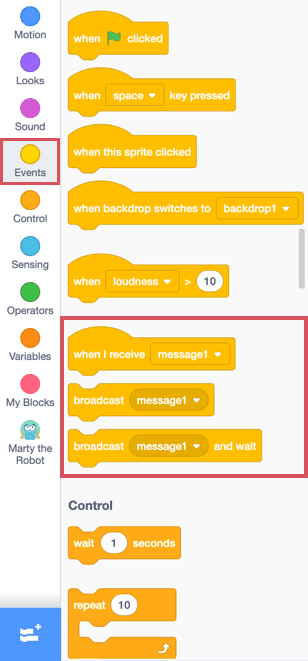
The broadcast blocks can be found under the Events section of our coding blocks. Once Marty has raised an arm, ready to start the handshake, we can broadcast a message telling the rest of our program to start the handshake.
Then all that is left to do is to run the two different actions! To do this we need to run our coding blocks in parallel - which means at the same time. Just like we can lift both arms at the same time, Marty can do some things at the same time.
Just above where you found the broadcast block in the Events coding block drawer, you will see a when I receive message1 block. This block will run when we broadcast the message. All that is left to do is to have two of these events happening - once for the arm movements and once for the eye movements!
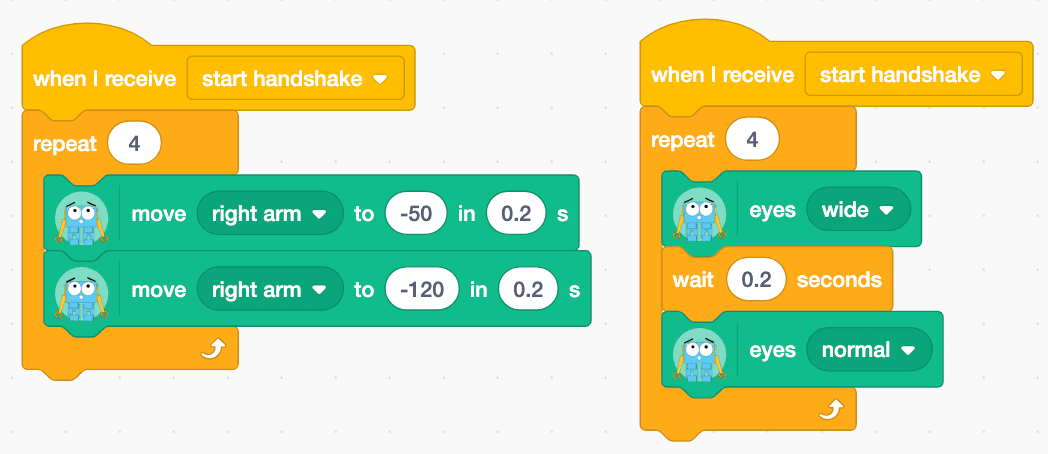
Hint: Try playing around with the timing of the two different movements to get them in sync!
getting interactive with sensors
We now have a handshake motion happening with some wiggling eyebrows to go along with the movements. The next step is to make the action interactive by monitoring the sensors and reacting to someone pushing on the hand to start the handshake.
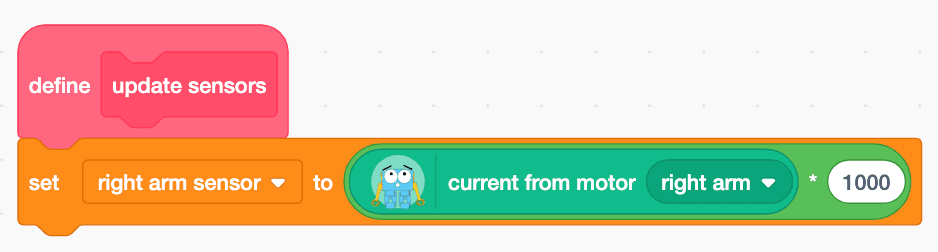
First of all, we need to learn how to read the motor currents to understand how much force is being placed on the arm. We can do this by storing the value being read from that joint into a variable so that it makes the value easy to regularly check.
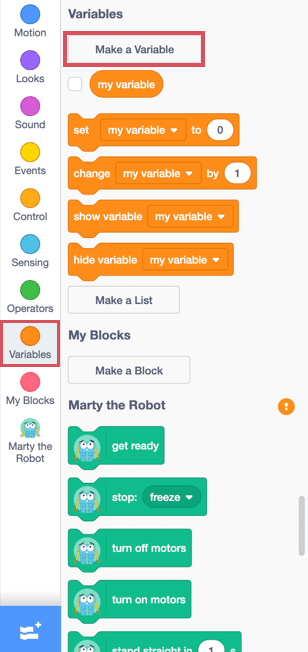
To make a new variable, select the Variable menu from the code blocks drawer followed by the Make a Variable button. You will get asked what you want to call your new variable - remember to make it something meaningful so that you can easily tell what that variable is storing.
The variable should be set to store the current from the right arm motor.

The numbers that we get back from the sensors can be very small. Try gently pushing down on Marty's right arm and clicking on the variable code blocks we just put together and see what value you get displayed on the stage section of the Scratch screen.
Hint: You will need to make sure that the checkbox beside the variable in the code blocks drawer is checked!
Lets make this number bigger by multiplying it by 1000.

Now try testing out what numbers we get back from the sensors!
It's important that we regularly update the number that we are storing in our variable so that we can stay up to date with whether someone has approached Marty for a handshake.
To make things easier, let's make a function so that we can easily call for the variable to be updated with one simple block. It's similar to making a new variable, select My Blocks from the code blocks drawer followed by Make a Block. You will get asked to name your new function - remember to make it something meaningful so that you know what each function is responsible for doing.
Now we need to set our function to update the variable that we have created to check if Marty's hand is ready for a handshake!
Hint: Remember to name your function something meaningful!
Finally, lets add it into our overall program. We need to update our sensors the first time and then afterwards we need to keep checking until we register the force on the right arm that signals the start of the handshake.
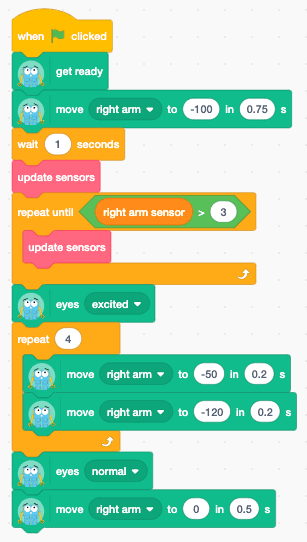
Hint: You will need to test what value to check for before starting the handshake but 3 is usually a good starting point!
What Next?
You have now just created and programmed your own handshake with Marty using Scratch. If you want to continue to explore how the force sensors work or how to continue to improve your handshake with Marty, here are a few ideas!
- Adding sounds to your handshake. You could play different sounds in time with Marty moving the arm up and down
- Add more moves into your handshake to create your own secret handshake with Marty. Can you program Marty to give you a high five?
- Can you make a game of handshake bop it where Marty lifts different arms up or down and you have to respond within a certain time?