

Mathematics - Upper Years - Lesson 1 - What is an Angle
Lesson Overview
Introduce learners to 0, 90 and 180° angles. Use Marty's arm to illustrate an angle. Change the degrees of one arm to model how 0, 90 and 180° angles can look. Identify drawn angles as being either 0, 90 and 180° angles.
- angle, arm, vertex, right angle, straight angle, degrees,
Content Sections
Mathematics - Upper Years - Lesson 1 - What is an Angle
Lesson Overview
Introduce learners to 0, 90 and 180° angles. Use Marty's arm to illustrate an angle. Change the degrees of one arm to model how 0, 90 and 180° angles can look. Identify drawn angles as being either 0, 90 and 180° angles.
- angle, arm, vertex, right angle, straight angle, degrees,
- Tablet with Bluetooth 4.2+
- Mathematics - Angles
-
- Activity pages
- Marty the Robot V2
- A device with MartyBlocks to show the angles in action
- Notebook or paper for extension activity
Learning Objectives
- Describe what an angle is.
- Say the value of some angles.
Pre-Lesson Preparation
Open the Marty the Robot app and build the following two pieces of code into the workspace:
This is for the Marty Angle Warm-up (in the time for practice section)
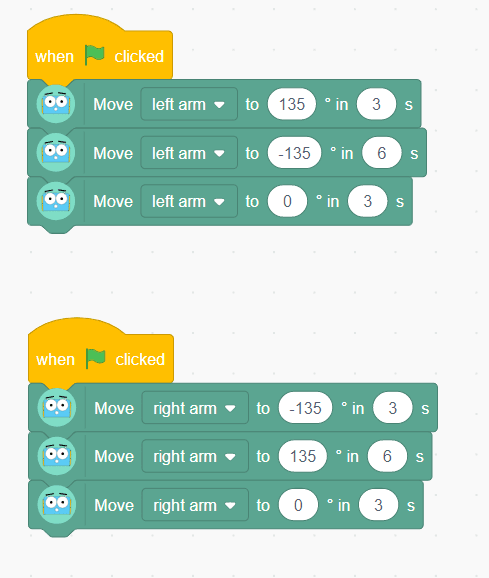
This is to have Marty display a range of 0, 90 and 180° angles in the time for practice section
Save each of these pieces of code in the app and give them appropriate names. Please consult the teacher guide for step-by-step instructions for building them.
Warm-Up
Share with learners the objectives and success criteria for the day's lesson, from slide 2 of the presentation in the educator resource section; perhaps display this before the lesson starts and keep it displayed until another slide is needed.
Warm up the class by modeling a variety of angles, with your left and right arms. You need to turn to the side so that learners see either your left or right side, in profile.
Tell learners, "We are going to start with some angle exercises: we are going to use our two arms and make an angle by holding both our arms out, straight in front, and moving one of them to point above our heads. The angle is how much one of my arms has turned at my shoulder; that is a measurement called an angle. Today we will create different angles and then you will get a look at some angles with Marty the Robot."
Bring both arms straight in front. Follow this with one arm directly in front and the other directly behind.
As you model the angle, ask learners to copy what you do. For this lesson, keep to 0°, 90° and 180°, mixing them up to give learners a baseline for comparison; slowly go from one to the next to illustrate that the angle is the amount of turn. Keep one or the other arm straight ahead while exercising at this stage of the lesson. Swap arms to show that either one can be pointing straight ahead, and an angle is still created. Ask learners if anyone would like to have an opportunity to lead others in the class. Continue this until everyone seems 'warmed up',
Get Learning
Revisit the demonstrated angles, giving each a name: 90° angle or right angle, 180° angle or straight angle and 0°. Here are some ideas for information you could share.
- "we use degrees to measure the size of an angle"
- "0° is when our arms are together"
- "we call the parts that make an angle arms"
- "our shoulder is where the vertex of the angle is, the vertex is where the two arms of an angle meet"
- "as I turn my arm one way at the shoulder, the angle increases"
- move your arms between 0 and 90°, to show the increase and decrease in the turn, and have learners copy you
- "90° is when our arms are pointing in different directions like the corner of a book, but not opposite directions, and we call it a right angle"
- repeat this process decreasing the angle from 90 to 0
- "as I turn my arm the other way at the shoulder, the angle decreases"
- extend your arms so that one arm is pointing directly forward while the other directly back
- "180° is when our arms are pointing in opposite directions, like the edge of a table, it is a straight line and we call it a straight angle"
Challenge learners to show you other parts of their body they can use to model the different angles, this may require them to lie on the ground and use their legs. Alternatively, ask them to show you, with their arms, vertically when you display your arm horizontally. This needn't be required for all learners: some may need the security of copying what you are doing.
Time for Practice
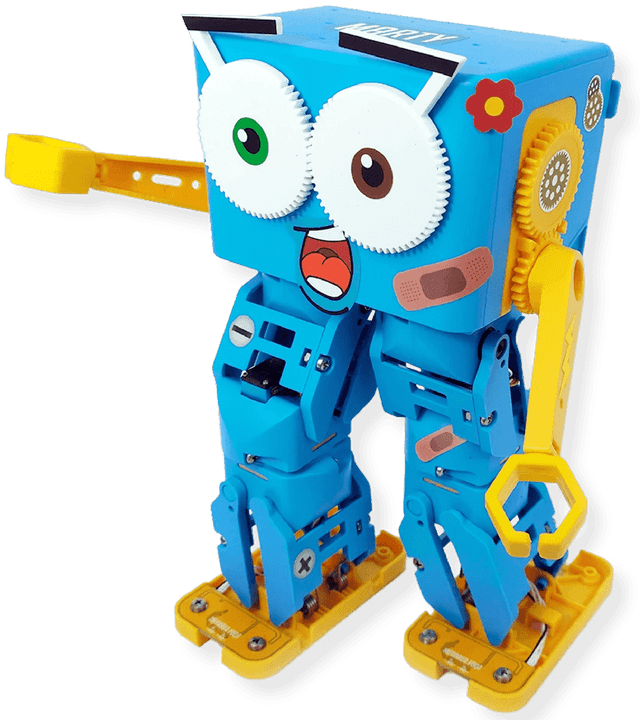
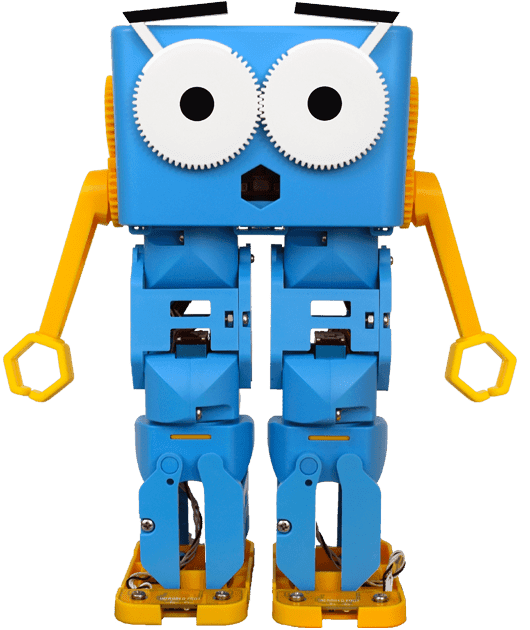
Present Marty to the class as an expert angle maker. Inform learners that Marty loves to make angles with his two arms, just like we did with our two arms. Turn Marty to the side so that learners can see the arm joint at Marty's shoulder. Run the code block that has Marty move from 0° to 135° and back through 0° to -135° and back to 0°. These are the suggested limits on Marty's rotational movements. Alternatively, show slide 3 from the presentation for the angle warm up.
Tell learners that Marty is now warmed-up and ready to show some angles. Ask learners to see if they can copy Marty:
- press the green flag on the MartyBlocks program you created
- move Marty's left arm to a position in front of them, to make a positive angle
- press one of the three blocks that controls Marty's right arm: to make a 0, 90 or 180° angle
- ask learners to copy the movement and ask them what angle that feels like: 0, 90 or 180°
In order to use the -180° block, you need to move Marty's arm at least 45° forward of 0°. This is because Marty's range of movement is from -135 to 135°.
Repeat this process until you feel they are confident displaying these three base angles.
Ask individual learners to model an angle, either 0, 90 or 180°. Move Marty's left arm to copy the greatest positive angle of the display and press the block of code that will create the angle the learner has modeled. Ask the class if they think Marty has done a good job. Have them copy the initial learner and choose a new volunteer.
Repeat as necessary.
Share with learners the practice activity in the workbook, in the resources section, that shows a collection of Martys creating angles with their two arms. Learners can choose how they want to indicate the value of the angle, either writing 0, 90 and 180°, drawing lines to connect equivalent angles, or something else that you use with your class. The first three examples have rays drawn over Martys arms - the arms of the angle - share with learners that doing this may better support seeing the size of the angle compared with just using the photo of Marty.
The second part of the activity sheet challenges learners to look for examples in their environment where they can see examples of arms that create 90 and 180° angles. Some examples may include table surfaces, corners (room, books, desks, window frames), monitor edges. Celebrate these examples and challenge them to think of more obscure ones or ones that they cannot see just now but can picture in their heads.
Cool Down
Bring learners back together to discuss the challenges they faced and overcame. Have learners share any strategies they used to identify which angle Marty's arms created. If confident, have learners model some of the example questions and say what angle they created.
Suggested questions you might ask:
- How would you describe a 90° angle?
- What were some interesting places where you found a 90° angle?
- Were all the angles you discovered flat on the ground or a table? Were some angles up the way, like on a wall? Were there different ways you saw angles displayed?
Carry out any end of lesson routines.
Extensions & Support
Extend
Task learners to draw a picture that has multiple straight lines and right-angle corners. Challenge them to create at least 8 of each in their drawing, and either label it or use a color to indicate which angle they have drawn.
Support
Encourage learners to model each of the photos of Marty from the activity page. Letting learners experience how Marty looks will help them to decide how much of a turn has been made between the two arms.
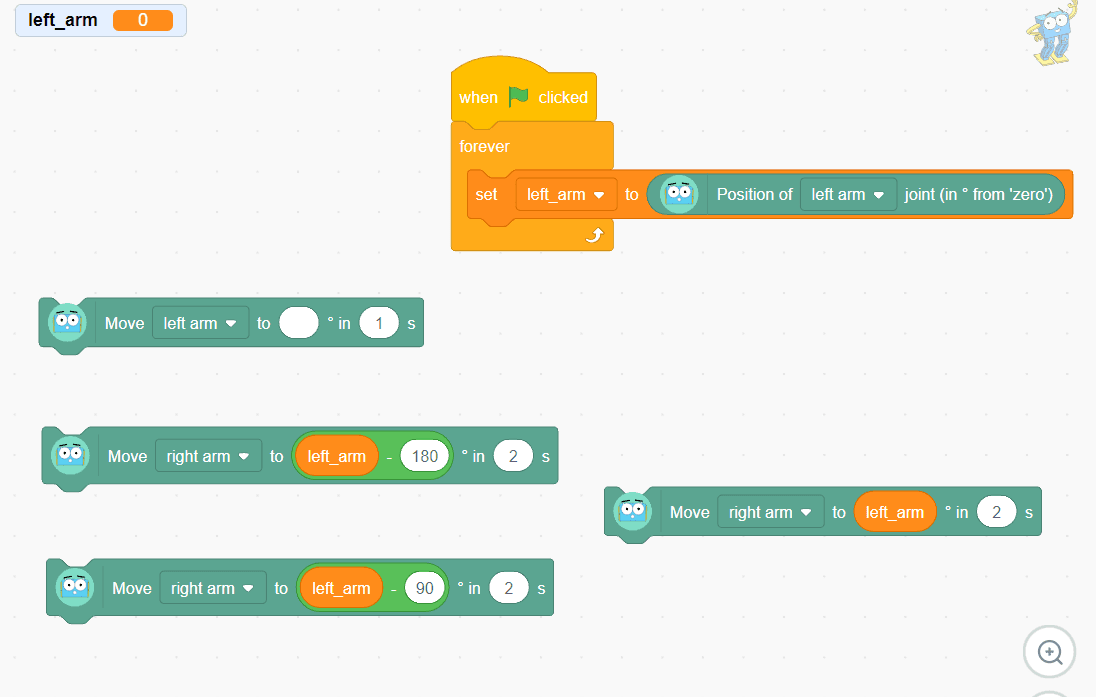
For learners still a bit puzzled by some of the examples, show how you can move either your own arms and maintain the angle of turn or do so with Marty with the following code block. (There is a step-by-step guide in the teacher guide document to make this.)
- Mathematics: Measurement and Geometry – Geometric reasoning
- CSTA Education Standards
- Mathematics KS2: Geometry – properties of shapes
- Mathematics:
- Literacy & English: Listening and Talking
- Health and Wellbeing: Mental, Emotional, Social and Physical Wellbeing
- Numeracy: Shape, Position and Movement
- Elementary Math: Knowledge and Skills