Let's extend python to make use of other libraries. What other Python resources can we tap into to use with Marty. Why not control Marty with the keyboard?
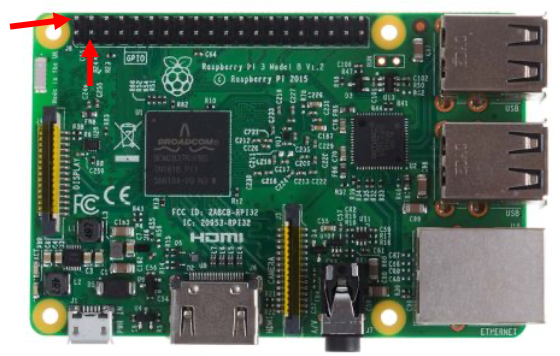
Have learners explore the possibility of connecting a wireless keyboard to the Raspberry Pi. Following the creation of the code, via the headless setup, learners should be able to take Marty for a walk without any visual feedback on key presses. Click here for the procedure to follow for setting up a wireless keyboard with a Raspberry Pi.
Have the main commands for use with the remote control - keysym(), bind_all(), mainloop() and Tk() - along with the default parameters available for learners. Additionally, if needed, share the first two steps code with learners, here, or in the resources section of the lesson.
Setting up the python environment, for Marty
Marty Uses a Raspberry Pi in Python
Tkinter documentation - a list of common commands used by Tkinter
Bind command - the code uses bind_all but the description for bind is better
keysym command - a list of the keys that can be used for Tkinter
mainloop command - a description of the mainloop function
Tk command - a question and description of the Tk function
22 of 22 linked standards shown.
| Curriculum area | Linked standards |
|---|---|
| Digital Technologies, Design & technologies: Digital Technologies |
Select a code to read the full standard.
| Curriculum area | Linked standards |
|---|---|
| General standards |
Select a code to read the full standard.
| Curriculum area | Linked standards |
|---|---|
| Health and Wellbeing: Mental, Emotional, Social and Physical Wellbeing | |
| Literacy & English: Listening and Talking | |
| Literacy & English: Reading | |
| Literacy & English: Writing | |
| Technologies: Computing Science |
Select a code to read the full standard.
| Curriculum area | Linked standards |
|---|---|
| Computing, Design and Technology: Computing |
Select a code to read the full standard.
| Curriculum area | Linked standards |
|---|---|
| International Society for Technology in Education (ISTE) |
Select a code to read the full standard.
This lesson assumes learners have an understanding of Python documentation and how to import functions from libraries.
In this lesson, learners will be accessing the Tynker library to bind keyboard keys to actions, for Marty. This will allow learners to control Marty via a keyboard. There are extension activities that will allow users to connect a wireless keyboard enabling learners to take Marty for a walk, without the need for a device.
Experience using Command line syntax, experience with a Raspberry Pi and python, experience accessing importing python libraries
Have a freely available web game running on the display. There are a wealth of resources that should be available following this link . If this is not available to access at your school, perhaps displaying on an app on your phone, or asking learners how they control characters on their pc in games like paper.io, minecraft, or classics like snake and pacman (feel free to replace these examples with other titles with which you know your class is familiar). If this is not available, there is a video in the presentation showing a user with a game controlled by a keyboard. You can decide whether you want to display a game, show the video, from the presentation, or begin with the objectives and success criteriam, from the presentation.
Some might suggest that they use the mouse for these games, others might mention a connected controller but it is hoped that some will suggest a keyboard and in particular the arrows keys or 'wasd'. Ask learners to suggest their preference for keyboard, mouse or controllers for interacting with games. Record responses on the board. Share with learners that today they will be coding a keyboard controller for Marty, but first they need to decide on the keys, what each key will do and how to write the code to bind the keys to an action.
Key binding is a very common practice when interacting with computers. Ask any learners if they have ever needed to copy or paste text quickly, in their computer, and what did they do? Did they use the mouse to access the menu? Right click to access the menu? Use ctrl and a letter for a shortcut? It is the key press, in the case mentioned Ctrl-C or Ctrl-V that is an example of a key binding that someone coded into a PC browser or word processor, for example. If you are using another operating system, it might be command-C or command-V.
Developers, who code games or physical devices, often bind keys to perform specific commands. The most commonly used key bindings are wasd or the arrow keys for the four directions and the mouse for turning. Let's witness this in action with Marty, making use of a keyboard to control the movements.
In order to do any work for Marty, we have to import the martypy library, as we have since using Marty and Python. However, Marty does not come with built in functionality for key binding. For that we need to import a second library called Tkinter (the T is silent, when pronouncing). Tkinter is imported much the same way as martypy:
from martypy import Marty
marty = Marty('exp', '/dev/ttyAMA0')
import tkinter as tk
marty.get_ready()
The only difference here is that tkinter is imported in full and is renamed as tk in one line.
Below these lines in the code are where tkinter starts its work: this is where an event object is named, which will handle the input from the keyboard. In the example, the object is called remote_key but this could be anything you or the learners want to use. Below this code, a variable is declared with the task of storing the key that is pressed; key_press = event.keysym.lower() 'keysym' is the part of the command that recognises the key pressed, for the example code, only letters are used but keys like 'space', 'uparrow' or 'downarrow' could also be used; 'lower' converts any keys to lower case to reduce confusion, on the off-chance learners press the shift key or have pressed the caps lock key. Following this code are a series of conditional statements that access Marty and run the associated command. You will notice that some commands make use of the parameters: turning and walking backward, this is because these two commands make use of the walk() command but, by default, walk() commands Marty to walk two steps straight forward.
In addition to the commands, for Marty, I have included a print command for each keypress. The reason for this is that while building, learners get some onscreen feedback that the code works, in case there is not a space available for Marty to walk, yet.
The workbook highlights keysym(), bind_all(), mainloop() and Tk(), which are instrumental in the code functioning properly. If learners research these four commands, they should have everything they need to be able to complete the remote control code.
The example below shows a conditional statement for two steps forward, the code for this is included in the presentation so learners can get started with the conditional statements they will need.
if key_press == 'w':
        print('Marty walks two steps forward')
        marty.walk()
In addition to the support in this lesson plan, the code in the resources document is properly commented. It is up to you how much you want to share with learners and how much you want them to explore themselves; this could be a good excercise for learners to search for documentation and how to implement the libraries.
Learners will need some time to do two things for this lesson in order to achieve success: write the conditional statements and properly use the commands from the Tkinter library. The conditional statements should be straightforward, the only point to consider is the difference between one if statement and multiple elif statements or multiple if statements. There is an exercise in the workbook for learners to consider the impact of these two options on the efficiency of the code.
Unless learners have previously used the Tkinter library, implementation of the functions will take time. Remind learners about exploring documentation and explaining what the different parts of the code means, when asked: use the martypy documentation as the model. Learners need to apply their understanding to the unfamiliar Tkinter library so this should be a student-led exercise: be available to support and answer questions as and when they arise.
Bring learners back together to discuss the learning that occurred. Have groups share their thoughts about the challenge that was presented. Encourage every group to suggest what were key takeways that promoted success with their code.
Suggested questions you might ask:
Carry out any end of lesson routines.
Log off devices and clear everything away.